Sync identity provider groups to database roles
View as MarkdownAs an administrator of a Materialize organization, you can provision groups from your identity provider (IdP) with SCIM, assign those groups organization roles, and map custom roles to database roles.
The mapping has three layers:
| Layer | Example | Managed in |
|---|---|---|
| IdP group | analytics-team |
Your identity provider |
| Custom organization role | analytics_reader |
Materialize Console (Account Settings > Roles) or Terraform |
| Database role | analytics_reader |
SQL or Terraform |
SCIM provisions the group and its members. You assign the group a custom organization role. When a member connects, Materialize reads their organization role keys from the authentication token (JWT) and reconciles membership in existing database roles with matching names. The IdP group name can differ from the database role name.
oidc_group_role_sync_enabled
is enabled by default for Cloud organizations and confirm the production
oidc_group_claim setting used for database role sync. Confirm how to obtain
the JWT key for a role created in the Console.
Before you begin
-
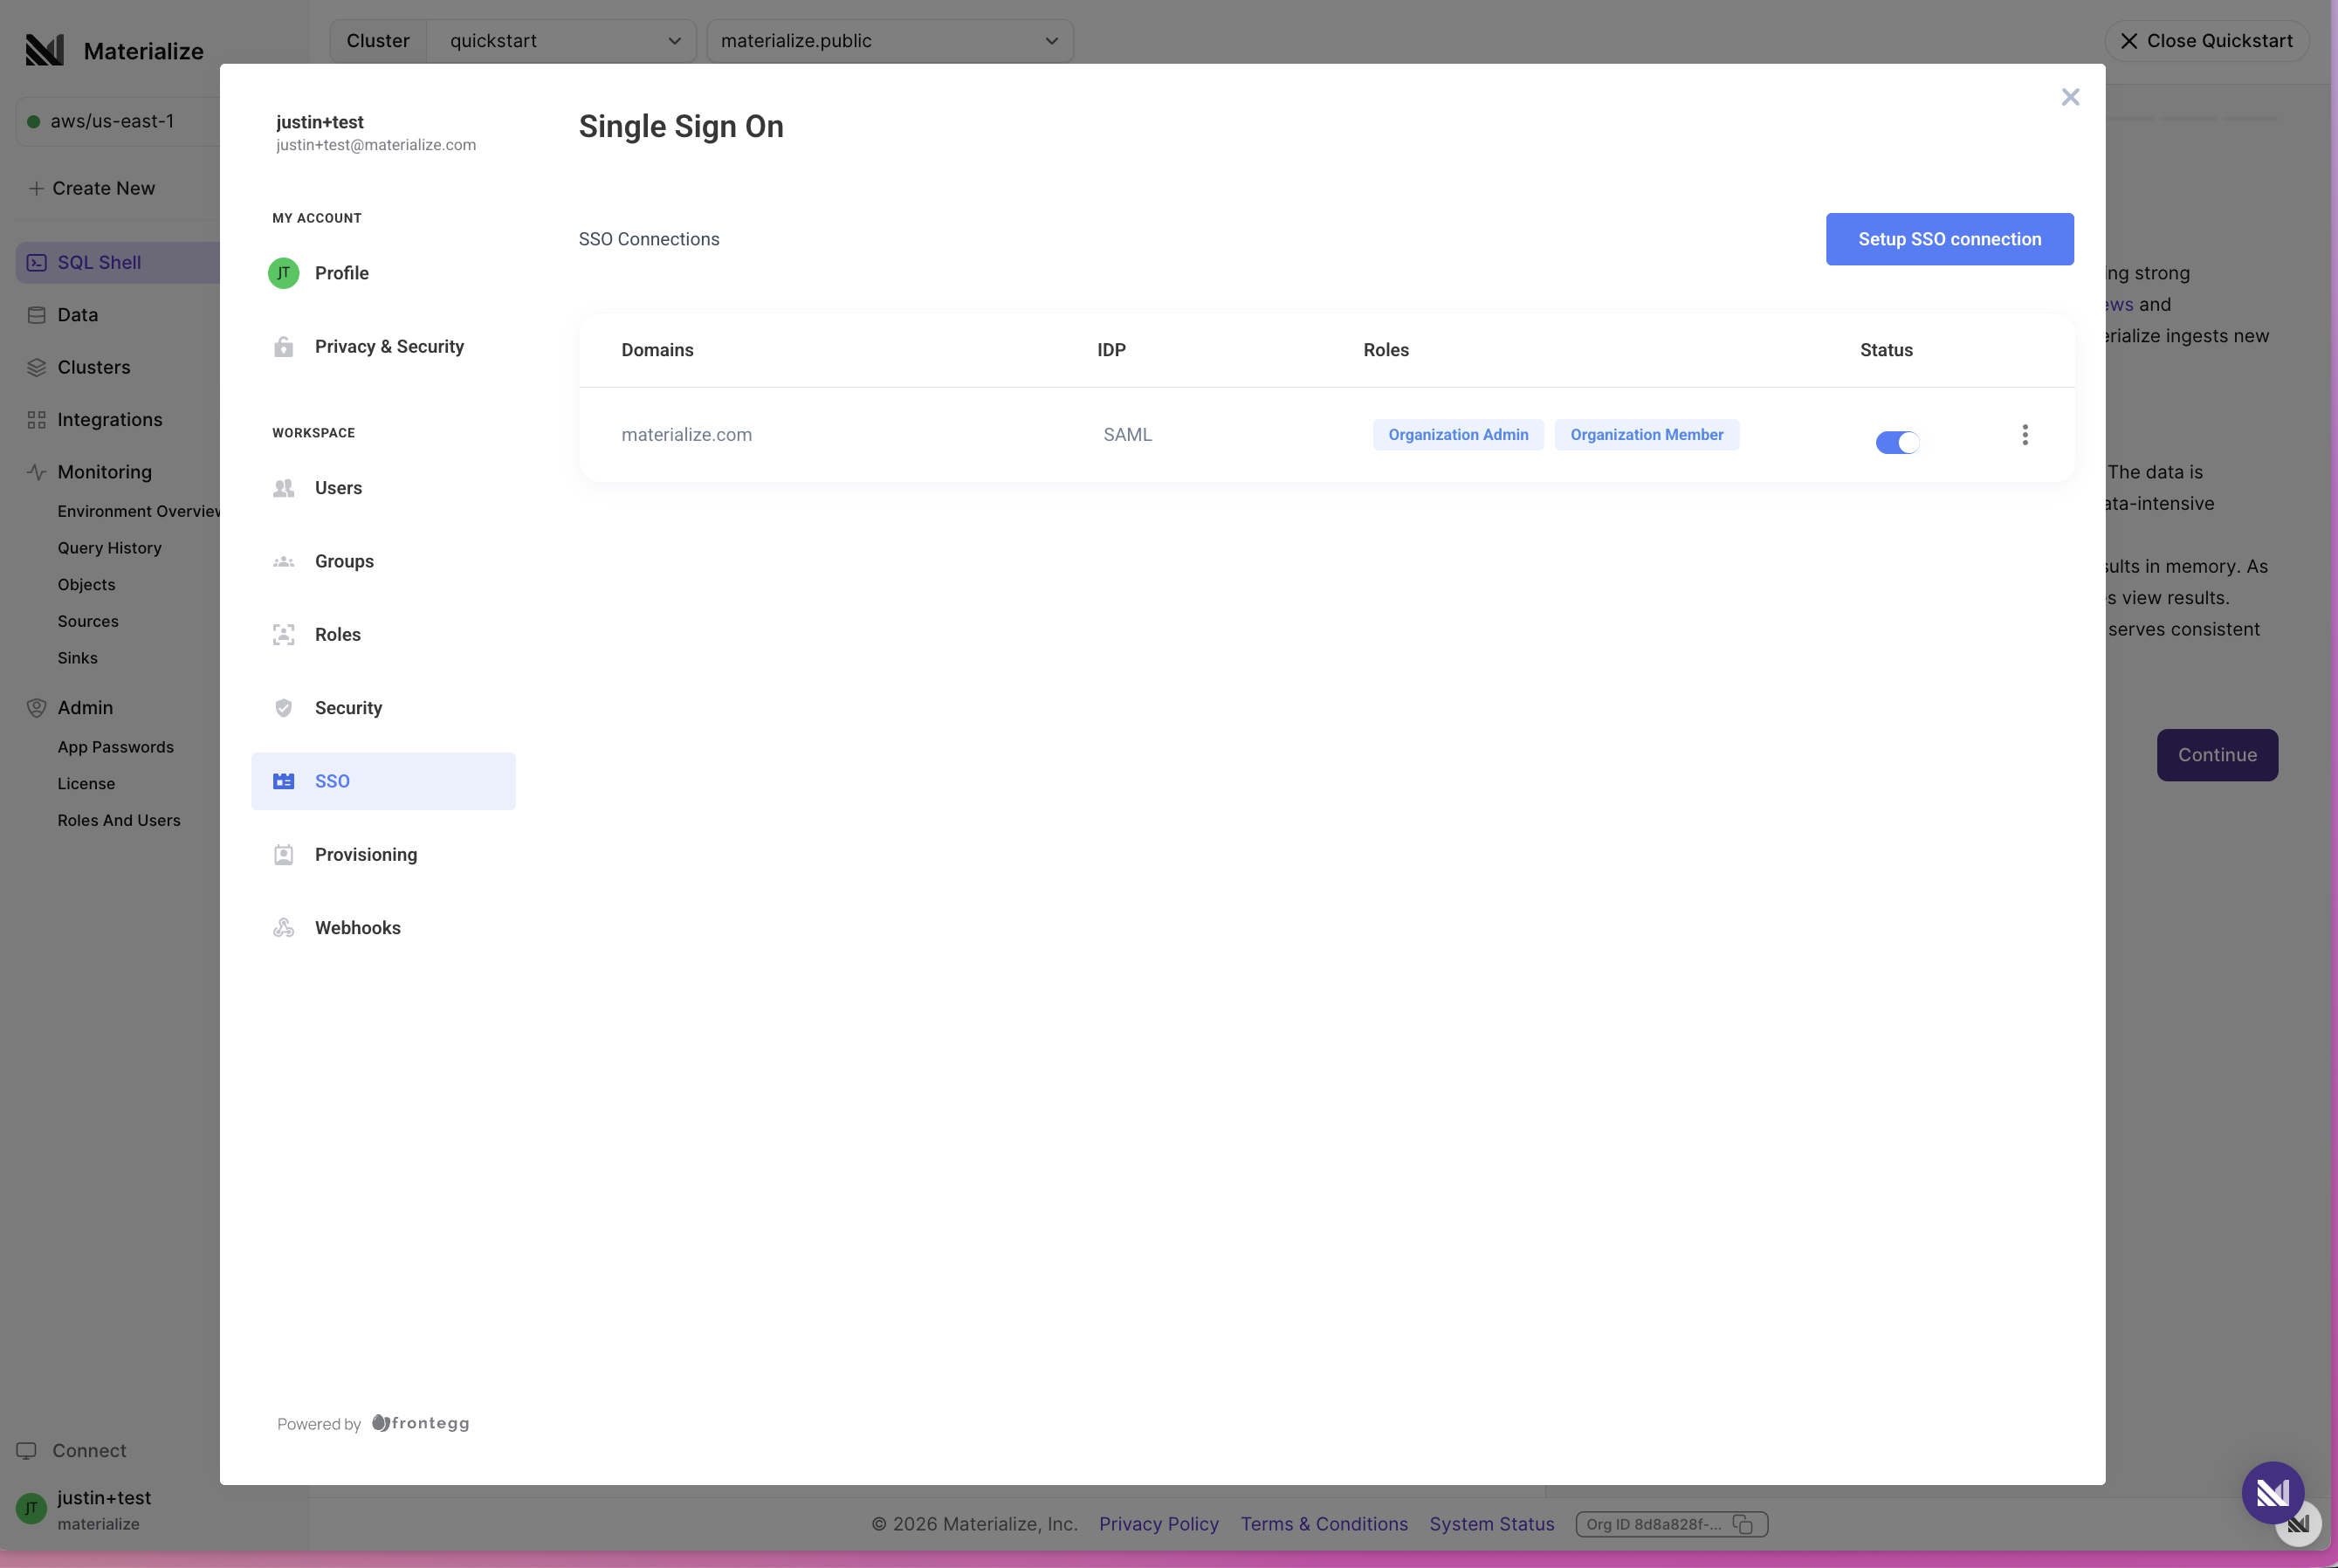
Your Materialize organization must have an SSO connection configured for your identity provider. Group sync builds on SSO, so set that up first. You can confirm your connection under Account > Account Settings > SSO.
-
You must have an identity provider that supports SCIM 2.0 provisioning (e.g., Okta or Microsoft Entra ID).
-
Only users assigned the Organization Admin role can manage provisioning, groups, and custom organization roles.
Step 1. Create a SCIM connection
-
Navigate to Account > Account Settings > Provisioning.
-
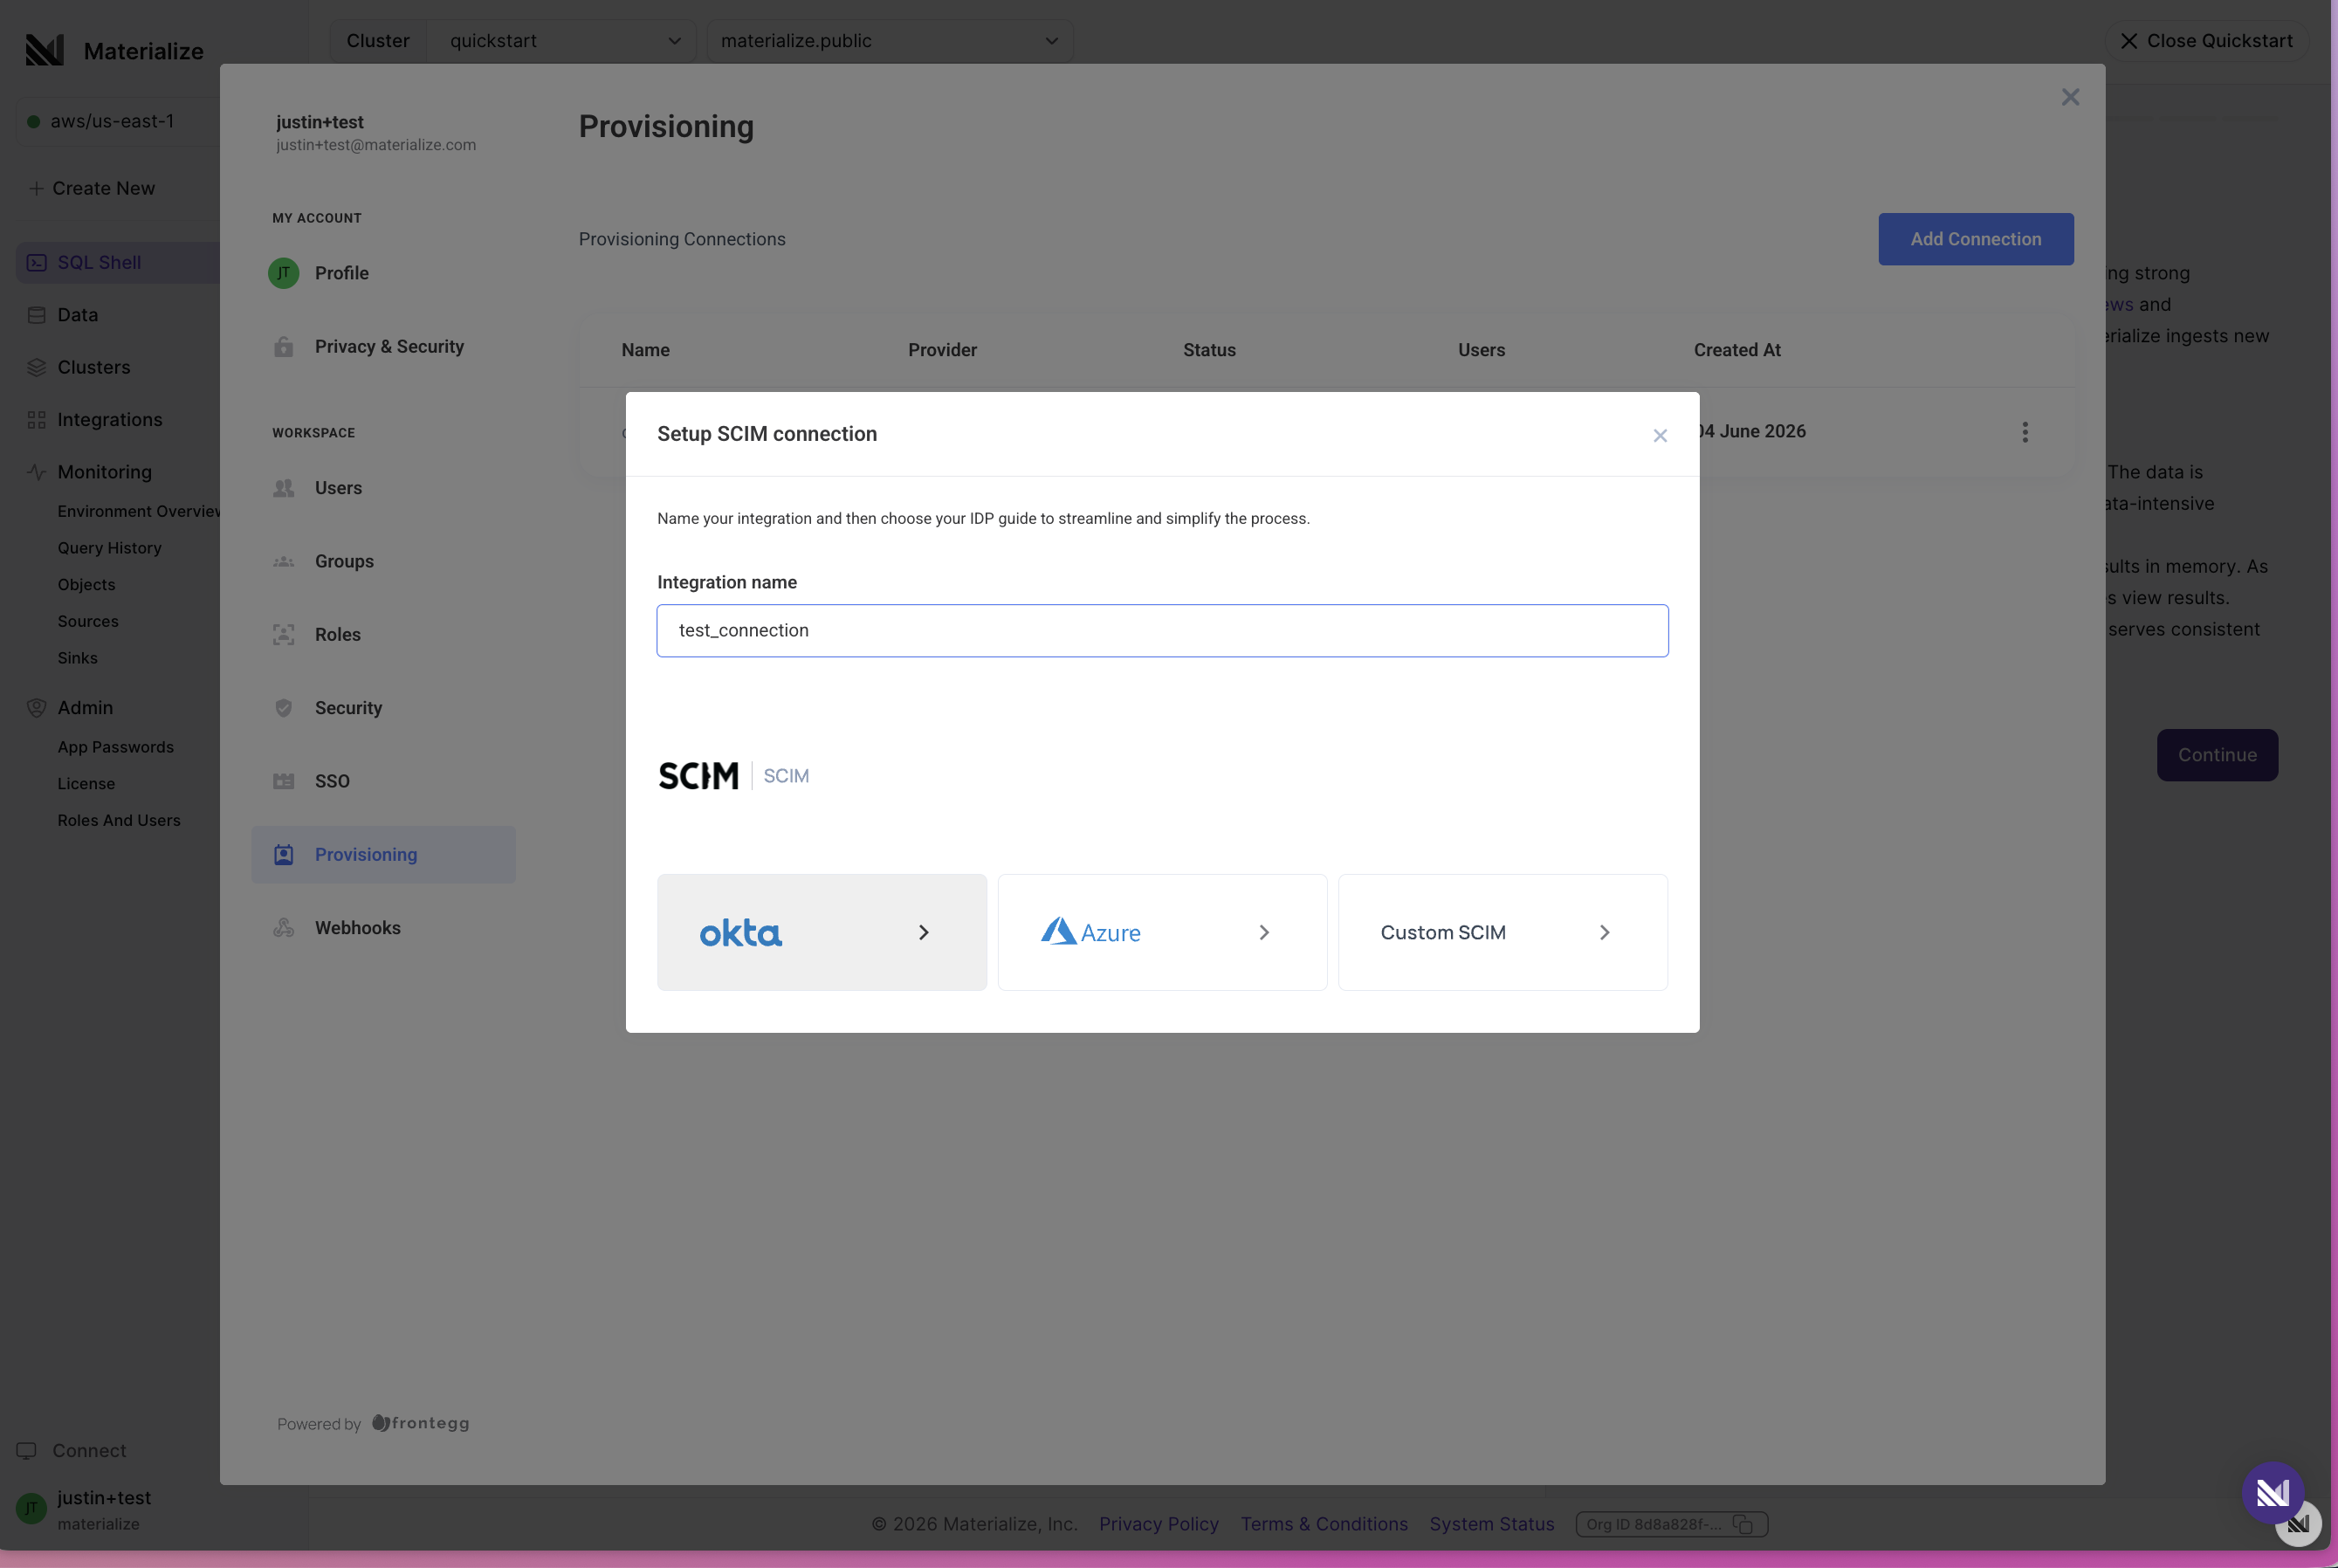
Click Add Connection, name the integration, and select your identity provider (Okta, Azure, or Custom SCIM for any other SCIM 2.0-compatible provider).
-
Follow the in-console guide for your provider. The Console generates a SCIM endpoint URL and an API token, which you enter into your identity provider’s provisioning settings.
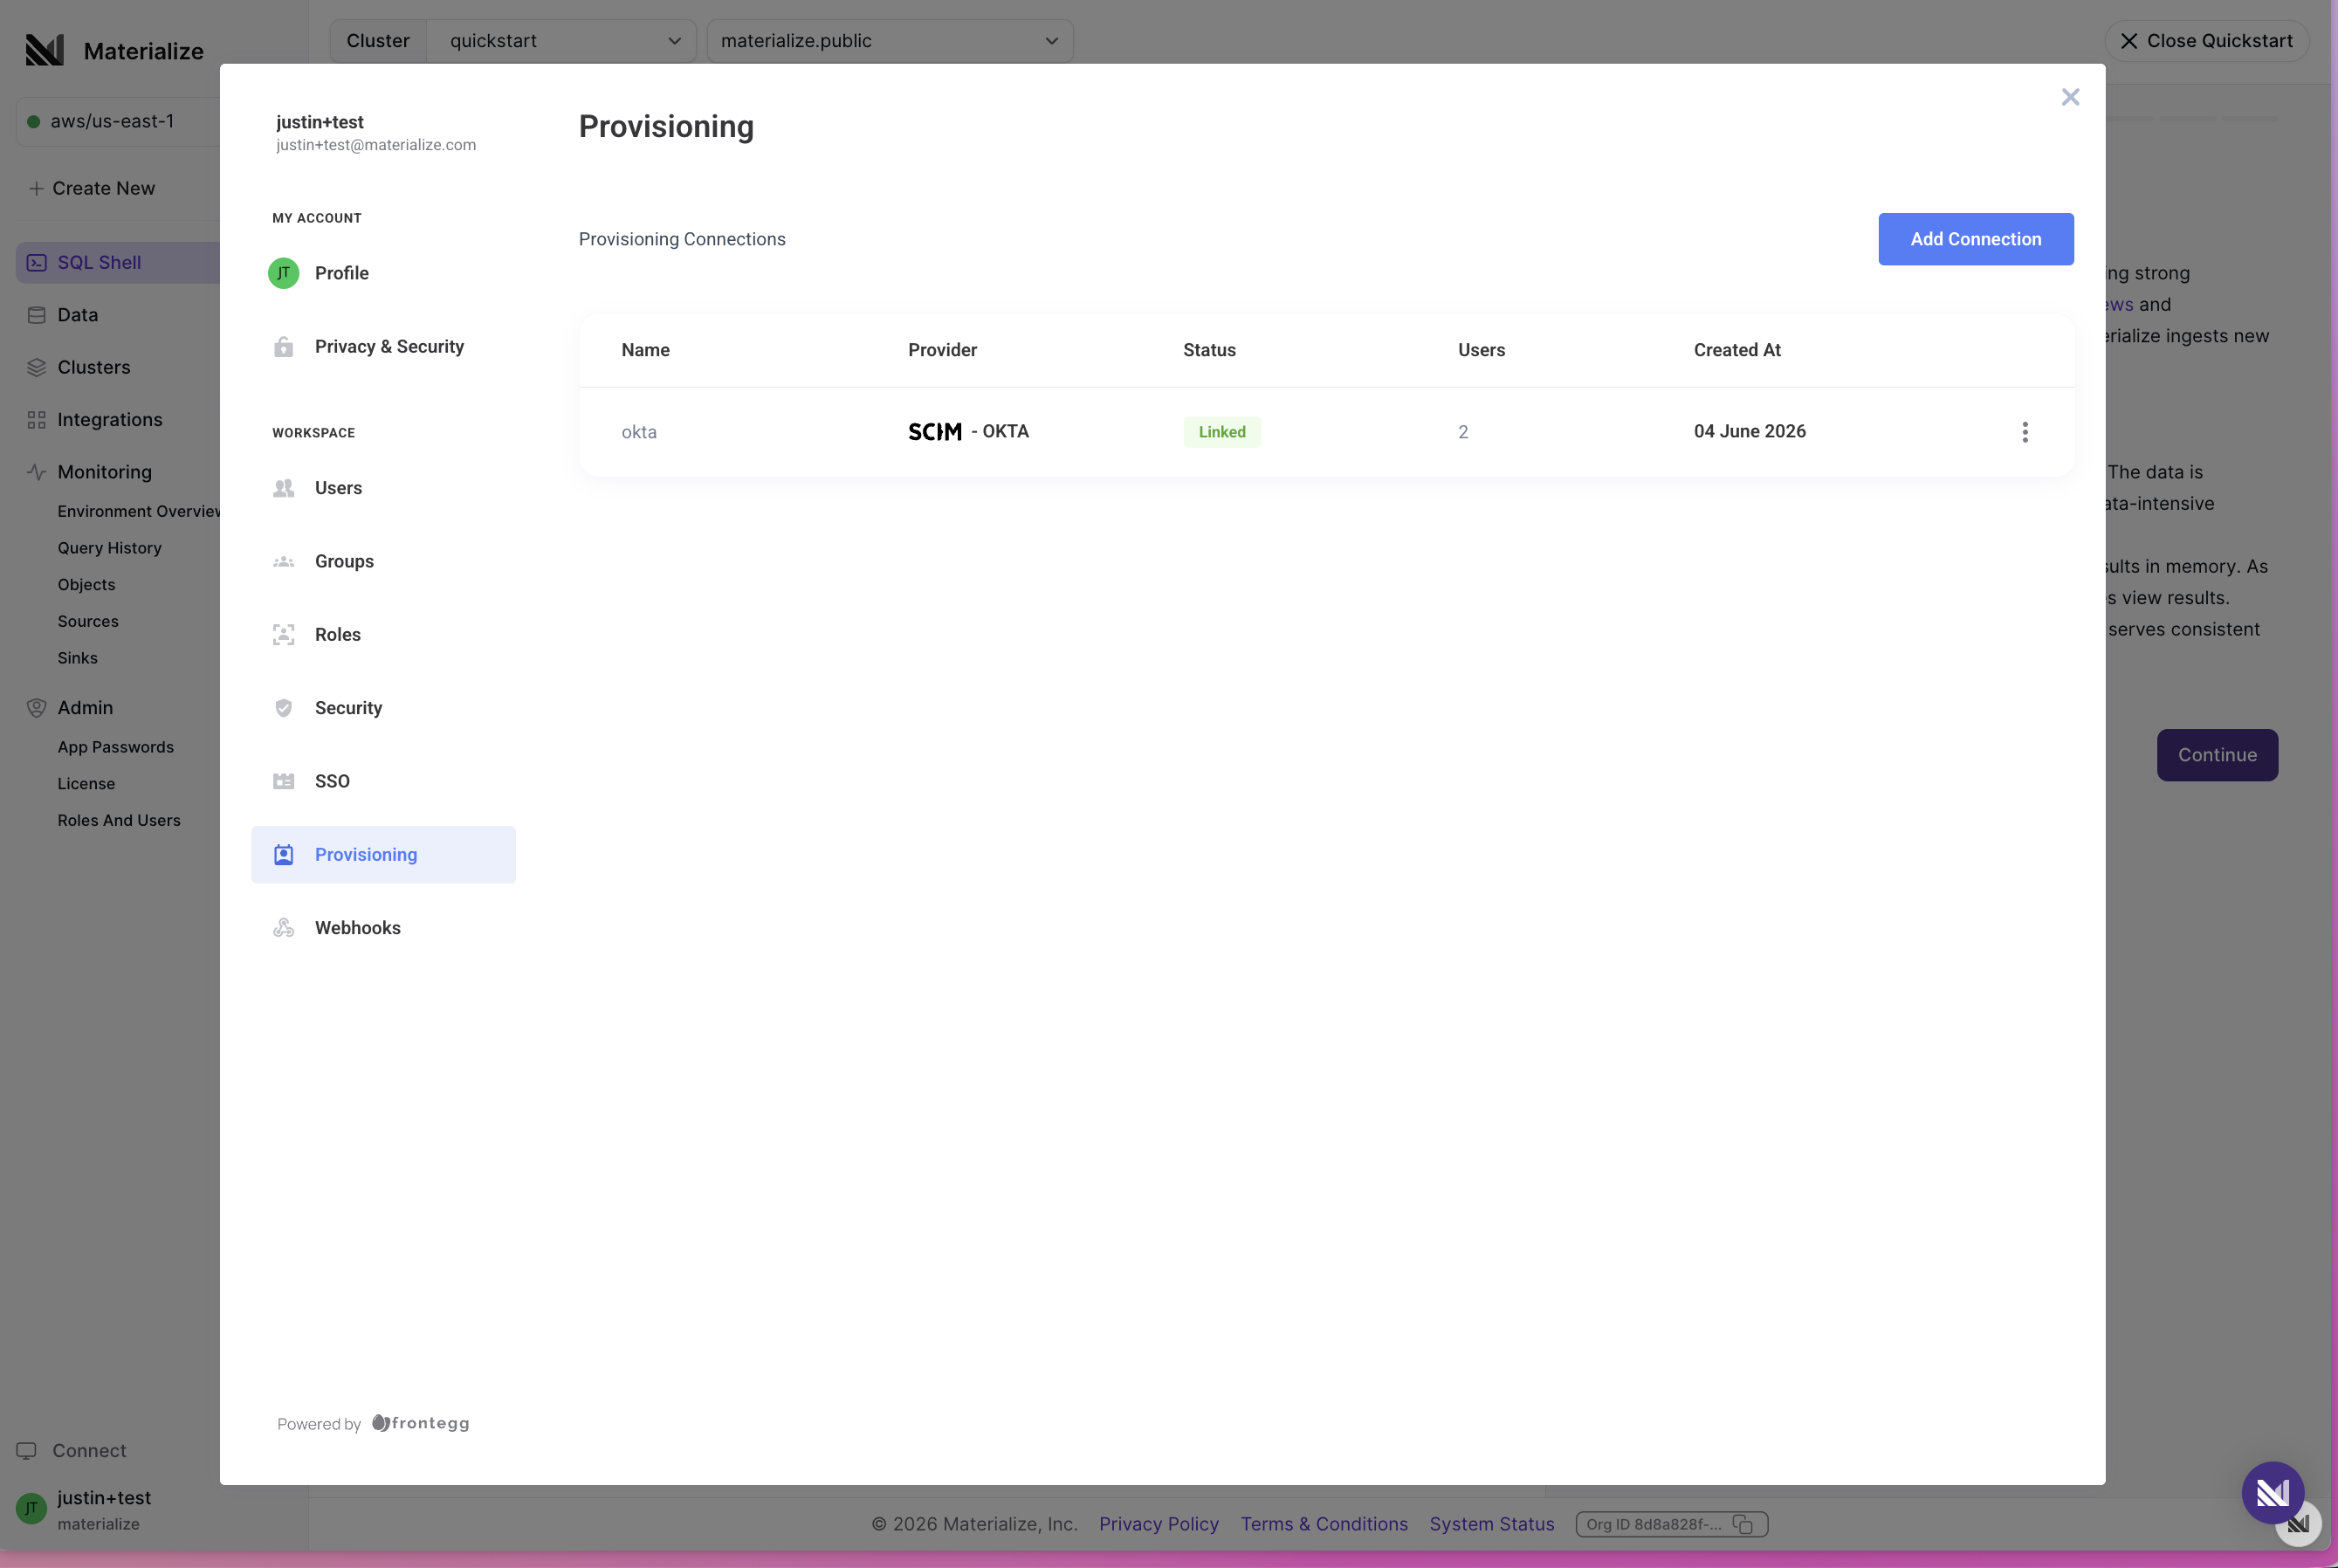
Once your identity provider connects successfully, the connection shows as Linked.
Step 2. Choose which groups to sync
Materialize only syncs the groups you explicitly configure your identity provider to send. Your other IdP groups are not visible to Materialize.
-
In the Okta Admin Console, open the SCIM application you connected in Step 1.
-
On the Assignments tab, assign the users (or groups) that should be provisioned into Materialize.
-
On the Push Groups tab, click Push Groups and select the groups to sync, either by name or by rule.
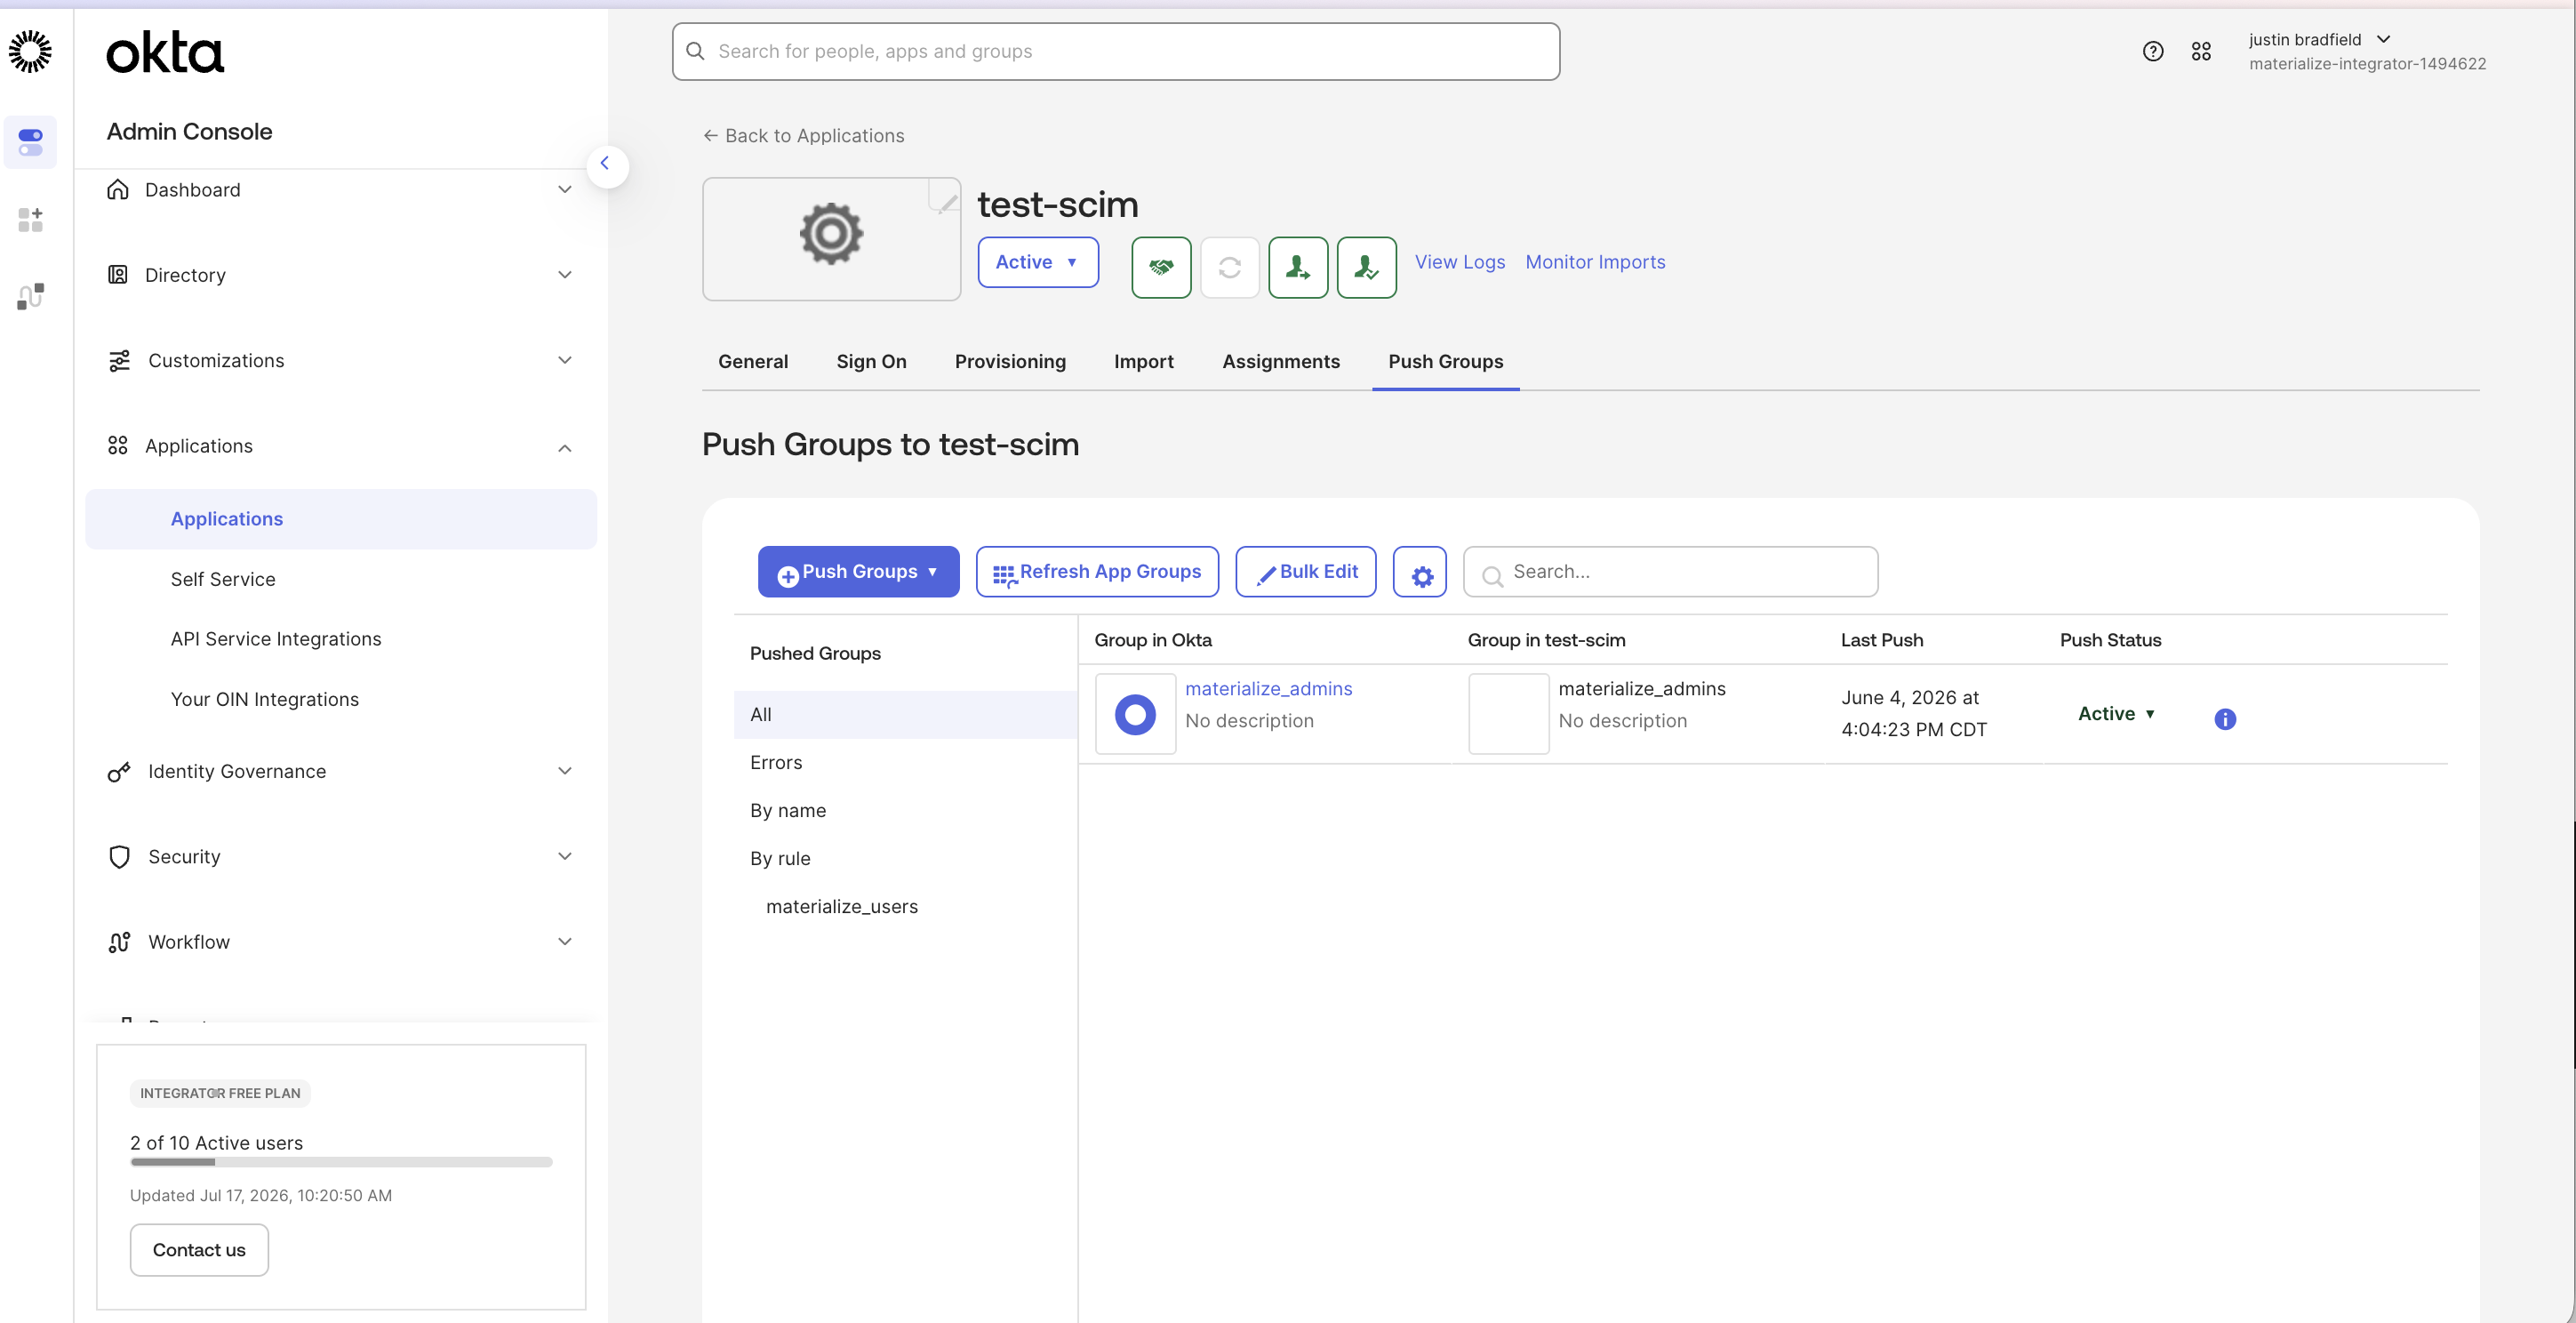
Once pushed, the groups and their memberships appear in the Materialize Console under Account > Account Settings > Groups, marked with a SCIM badge. Manage group names and membership in the IdP. You can edit the organization roles assigned to a SCIM-provisioned group in Materialize.
Steps 3–5. Map groups to database roles
Wait until the group appears under Account > Account Settings > Groups. Multiple groups can grant the same organization role, and one group can grant multiple roles.
You can assign a built-in role to a SCIM group without creating a custom role:
| Role | JWT key |
|---|---|
| Organization Admin | MaterializePlatformAdmin |
| Organization Member | MaterializePlatform |
Retain Organization Member alongside custom roles when users need its permissions. Assigning Organization Admin makes a user a Materialize superuser, so do not use it to grant limited database access.
Avoid creating database roles named after the built-in JWT keys unless you intend everyone with the corresponding built-in organization role to inherit their database privileges. See Limitations for other reserved names.
-
Under Account > Account Settings > Roles, create a custom organization role for database access, such as
analytics_reader. Note its JWT key. Choose its organization permissions separately from its database privileges. -
Under Account > Account Settings > Groups, edit the synced group
analytics-teamand assign it the new organization role. Retain any built-in role assignments the group still needs, such as Organization Member. -
In each Materialize region where the group needs access, create a database role whose name exactly matches the custom organization role’s JWT key, including case. For a key of
analytics_reader:CREATE ROLE analytics_reader;Grant this database role the privileges the group’s members need. See Access control (RBAC) for examples. Organization role permissions do not replace database grants.
Use version v0.11.9 or later of the Materialize Terraform provider for custom organization roles and SCIM group-to-role assignments. Provision IdP-owned groups and membership through your identity provider.
If you manage the SCIM connection with Terraform, create it with
materialize_scim_config before applying this configuration. Terraform cannot
wait for an IdP push simply by depending on the SCIM connection resource, so
wait for analytics-team to appear in Materialize first.
To assign a built-in role, include Admin or Member in the roles set of
materialize_scim_group_roles. These are Terraform’s aliases for
Organization Admin and Organization Member. Do not manage built-in
organization roles with materialize_organization_role.
resource "materialize_organization_role" "reader" {
  name           = "analytics_reader"
  base_role_name = "Member"
}

resource "materialize_role" "reader" {
  name = materialize_organization_role.reader.key
}

# Grant access to an existing schema; add grants for the objects readers need.
resource "materialize_schema_grant" "reader_usage" {
  role_name     = materialize_role.reader.name
  privilege     = "USAGE"
  database_name = "analytics"
  schema_name   = "reporting"
}

data "materialize_scim_groups" "all" {}

locals {
  analytics_groups = [
    for group in data.materialize_scim_groups.all.groups : group
    if group.name == "analytics-team" && contains(["scim", "scim2"], group.managed_by)
  ]
}

resource "materialize_scim_group_roles" "reader" {
  group_id = try(one(local.analytics_groups).id, "")
  roles    = ["Member", materialize_organization_role.reader.name]

  lifecycle {
    precondition {
      condition     = length(local.analytics_groups) == 1
      error_message = "Wait for exactly one SCIM group named analytics-team to be provisioned, then rerun Terraform."
    }
  }
}
The example uses the organization role’s exported JWT key as the database
role name and copies Organization Member permissions as a starting point.
Later changes to the base role are not copied automatically. The schema grant
assumes analytics.reporting already exists; add grants for the specific
objects the group needs to access. The group filter accepts scim and scim2
as SCIM-managed values.
materialize_scim_group_roles manages the group’s complete set of organization
role assignments. Include every role the group should retain. Do not use
materialize_scim_group or materialize_scim_group_users to take ownership of
IdP-provisioned groups or their membership.
Step 6. Verify grants and revocations
Have a dedicated test user in the synced group sign in and open a new database connection,
for example with the SQL Shell. On first sign-in,
Materialize creates the user’s own database role. The shared database role
analytics_reader must already exist.
As an administrator, query the role memberships:
SELECT r.name AS role, m.name AS member, g.name AS grantor
FROM mz_role_members rm
JOIN mz_roles r ON rm.role_id = r.id
JOIN mz_roles m ON rm.member = m.id
JOIN mz_roles g ON rm.grantor = g.id
WHERE r.name = 'analytics_reader'
  AND g.name = 'mz_jwt_sync';
The result should include the user’s database role as member and
mz_jwt_sync as grantor. To verify revocation:
- Remove the test user from the IdP group. Under Account > Account Settings > Groups, wait until the SCIM group no longer lists the user.
- Have the user sign out of all active Materialize sessions, then sign back in and open a new SQL Shell connection.
- Rerun the query. The sync-managed grant should disappear unless another group or a direct organization role assignment still grants the same custom role.
Restore the test user’s group membership after verifying revocation.
Grants and revokes performed by sync are recorded in
mz_audit_events.
How sync works
-
Sync happens at connection time. When a user connects, Materialize compares the organization role keys in their JWT against their sync-managed role memberships and applies the difference. Materialize makes a best effort to apply changes made in the IdP on the user’s next connection, but it may take several minutes for changes to be reflected. Changes are never applied to a session that is already connected.
-
Manual grants are never touched. Group sync only manages memberships it granted itself (grantor
mz_jwt_sync). A role granted manually withGRANTis never revoked by sync, even if the user leaves the corresponding group. Audit manual grants periodically to avoid users retaining access through stale manual grants. -
Organization roles without a matching database role are skipped. The connection proceeds without a
NOTICE, since not every organization role is expected to have a corresponding database role.
Limitations
-
Reserved database role names are never mapped. Organization role keys that collide with reserved database role names are skipped during sync. Reserved names are:
- Any name beginning with
mz_,pg_, orexternal_. - The
PUBLICrole. - The role-specification keywords
current_user,current_role,session_user,user, andnone.
Matching against reserved names is case-insensitive.
- Any name beginning with
-
Built-in organization roles are reserved. The names Organization Admin and Organization Member, and their keys
MaterializePlatformAdminandMaterializePlatform, belong to roles Materialize creates. You can map SCIM groups to these roles, but cannot edit or delete the roles. Create a separate custom organization role for database access mappings. -
Database roles are never created or dropped by sync. Group sync only assigns and unassigns database role membership. A custom organization role grants database access only after you create a matching database role.
-
Changes are not applied in real time. See How sync works.
Migrate from direct group-name mapping
Before changing the mapping mechanism for an existing organization:
- Create a custom organization role for every database role currently supplied
by group sync. Set its
nameto the existing database role name. Terraform uses this name as the JWT key. - Assign each synced group its corresponding custom organization roles.
- Coordinate the switch with Materialize support. The organization must use the role claim before the group-name mapping is retired.
- Verify both grants and revocations using Step 6.
Keep existing database roles and their object grants. Switching to a role claim without preparing equivalent assignments can revoke sync-managed memberships when users reconnect.