Simple SSO (OIDC)
View as MarkdownSingle sign-on (SSO) allows users to authenticate to Self-Managed Materialize using their organization’s identity provider (IdP) via OpenID Connect (OIDC). Instead of managing passwords directly in Materialize, users sign in through their IdP (e.g., Okta, Microsoft Entra ID) and receive a JWT token that Materialize validates.
Current limitations:
- SAML authentication is not supported. Materialize supports OIDC only.
- SCIM is not supported. Users are auto-provisioned on first SSO login (see Auto-provisioning roles), but removing a user from your IdP does not automatically deprovision their Materialize role.
- IdP group-to-role mapping depends on your IdP including a groups claim in the token. With
oidc_group_role_sync_enabledset, Materialize grants and revokes membership in existing roles whose names match the entries in that claim (oidc_group_claim, defaultgroups). Some IdPs limit custom claims by plan. For example, Okta may require a plan that supports them.
If you need SAML or SCIM, see Advanced SSO (OIDC, SAML and SCIM), which adds SAML, SCIM, and multi-IdP federation on top of the OIDC path documented here.
Before you begin
Make sure you have:
- An OIDC-capable identity provider (e.g., Okta, Microsoft Entra ID, or any provider that supports OpenID Connect).
- Admin access to your Kubernetes cluster where Materialize is deployed.
Step 1. Configure your identity provider
You will use the following values from your IdP configuration to configure OIDC system parameters for Materialize:
- The OIDC issuer URL
- The client ID for the console application
- If using service accounts, the client ID, client secret, and expected audience for each service-account application
The following steps create the OIDC application for the Materialize Console (browser-based login). If you also need service accounts, you will create additional applications in the Service accounts section.
-
In the Okta Admin Console, go to Applications > Applications and click Create App Integration.
-
Select OIDC - OpenID Connect as the sign-in method and Single-Page Application as the application type. Click Next.
-
Configure the application:
- App integration name: Enter a name (e.g.,
Materialize). - Grant type: Ensure Authorization Code is selected (PKCE is used automatically for single-page applications).
- Sign-in redirect URIs: Enter
https://<your-console-domain>/auth/callback. If you want to use the CLI token flow, also addhttp://localhost:9876/callback. - Sign-out redirect URIs: Optionally, enter
https://<your-console-domain>/account/login.
- App integration name: Enter a name (e.g.,
-
Click Save.
-
On the application’s General tab, note the Client ID.
Single-page applications use PKCE instead of a client secret. You do not need a client secret for the console application.
-
Go to Security > API and note your Issuer URI from the authorization server you want to use (e.g.,
https://your-org.okta.com/oauth2/default).Custom domains: When the authorization server Issuer is set to Dynamic (based on Request Domain), Okta issues tokens whose
issclaim uses your custom domain (for example,https://sso.your-org.com/oauth2/default) instead of the default Okta URL. Configure theoidc_issuersystem parameter in Materialize to match that issuer value exactly.WARNING! Use a custom authorization server (e.g.,.../oauth2/default), not the Okta org authorization server (the bare org URL, without an/oauth2/...path). Access tokens issued by the org authorization server have a fixedaudclaim and cannot carry custom claims or scopes, which breaks the Client Credentials flow and MCP clients. Custom authorization servers, includingdefault, require Okta’s API Access Management feature. -
Go to the Assignments tab and assign the users or groups that should have access to Materialize.
When a user authenticates via SSO, Materialize uses a JWT claim to determine the role name. See Mapping IdP users to Materialize roles for more details.
-
Configure the authorization server. In the Okta Admin Console, go to Security > API and click on the authorization server you want to use (e.g., default).
-
On the Settings tab, note the Issuer URI. This is the value you will use for the
oidc_issuersystem parameter. -
Go to the Scopes tab and ensure the
openidandemailscopes exist (they are present by default). -
Go to the Access Policies tab. You need at least one policy with a rule that allows the grant types you plan to use:
- Authorization Code: Required for the console login.
- Resource Owner Password: Required for the ROPC service account flow.
- Client Credentials: Required for the Client Credentials service account flow.
To add or edit a rule:
- Click Add New Access Policy (or select an existing policy).
- Click Add Rule within the policy.
- Under Grant type is, check the grant types you need.
- Under Assigned to, select the clients (applications) this rule applies to.
- Click Create Rule.
-
-
In the Azure portal, go to Microsoft Entra ID > App registrations and click New registration.
-
Configure the registration:
- Name: Enter a name (e.g.,
Materialize). - Supported account types: Select the appropriate option for your organization (typically Accounts in this organizational directory only).
- Redirect URI: Select Single-page application (SPA) and enter
https://<your-console-domain>/auth/callback. After registration, you can addhttp://localhost:9876/callbackunder Authentication if you want to use the CLI token flow.
- Name: Enter a name (e.g.,
-
Click Register.
-
On the application’s Overview page, note the Application (client) ID and the Directory (tenant) ID.
-
Go to Certificates & secrets > New client secret. Add a description and expiration, then click Add. Note the secret Value.
A client secret is not required for the console login (which uses authorization code with PKCE), but is needed if you plan to use the Client Credentials flow for service accounts.
-
Construct your issuer URL using your tenant ID:
https://login.microsoftonline.com/<tenant-id>/v2.0 -
Go to Enterprise applications > select your application > Users and groups and assign the users or groups that should have access to Materialize.
When a user authenticates via SSO, Materialize uses a JWT claim to determine the role name. See Mapping IdP users to Materialize roles for more details.
-
In your identity provider, create a new OIDC public client application (single-page application type) with the Authorization Code grant type and PKCE support.
-
Set the redirect URI to
https://<your-console-domain>/auth/callback. If you want to use the CLI token flow, also addhttp://localhost:9876/callback. -
Note the client ID and issuer URL provided by your identity provider. The issuer URL is typically the base URL of your identity provider’s OIDC discovery endpoint (without
/.well-known/openid-configuration). -
Ensure the
openidscope is available. -
Assign users or groups that should have access to Materialize.
When a user authenticates via SSO, Materialize uses a JWT claim to determine the role name. See Mapping IdP users to Materialize roles for more details.
Once you have configured your IdP, you will need the following values to configure OIDC system parameters for Materialize:
- The OIDC issuer URL
- The client ID for the console application
- If using service accounts, the client ID, client secret, and expected audience for each service-account application
Step 2. Enable OIDC authentication
To configure Self-Managed Materialize for OIDC authentication, update the following fields:
| Resource | Configuration | Description |
|---|---|---|
| Materialize CR | spec.authenticatorKind |
Set to Oidc to enable OIDC authentication. |
| Kubernetes Secret | external_login_password_mz_system |
Specify the password for the mz_system user. Add external_login_password_mz_system to the Kubernetes Secret referenced in the Materialize CR’s spec.backendSecretName field. The mz_system user always authenticates with a password. This user is required by the Materialize Operator for upgrades and serves as an emergency administrative account. |
| ConfigMap | mz-system-params |
Create an empty system parameter ConfigMap and reference it from the Materialize CR’s spec.systemParameterConfigmapName field. You will populate it with your OIDC parameters in Step 3. |
The following example Kubernetes manifest includes configuration for OIDC authentication:
v1alpha1 is the default CRD version for the Materialize Helm
chart. The Terraform modules default to v1 starting in v4.0.0.
With v1alpha1, instance rollouts require manually rotating a
UUID.
apiVersion: v1
kind: Namespace
metadata:
  name: materialize-environment
---
apiVersion: v1
kind: ConfigMap
metadata:
  name: mz-system-params
  namespace: materialize-environment
data:
  # Create an empty system parameter configmap for later steps
  system-params.json: |
    {
    }
---
apiVersion: v1
kind: Secret
metadata:
  name: materialize-backend
  namespace: materialize-environment
stringData:
  metadata_backend_url: "..."
  persist_backend_url: "..."
  license_key: "..."
  external_login_password_mz_system: "enter_mz_system_password"
---
apiVersion: materialize.cloud/v1alpha1
kind: Materialize
metadata:
  name: 12345678-1234-1234-1234-123456789012
  namespace: materialize-environment
spec:
  environmentdImageRef: materialize/environmentd:v26.46.0
  backendSecretName: materialize-backend
  authenticatorKind: Oidc
  requestRollout: 00000000-0000-0000-0000-000000000003 # Switching to Oidc requires a rollout
  systemParameterConfigmapName: mz-system-params # Adding a system parameter configmap requires a rollout
Apply the updated manifest to your Kubernetes cluster. See Upgrading for details on rollout configuration.
The v1 CRD is available starting in v26.30. It is opt-in for the Helm chart and the default for the Terraform modules starting in v4.0.0. See Adopting the v1 CRD to enable it.
apiVersion: v1
kind: Namespace
metadata:
  name: materialize-environment
---
apiVersion: v1
kind: ConfigMap
metadata:
  name: mz-system-params
  namespace: materialize-environment
data:
  # Create an empty system parameter configmap for later steps
  system-params.json: |
    {
    }
---
apiVersion: v1
kind: Secret
metadata:
  name: materialize-backend
  namespace: materialize-environment
stringData:
  metadata_backend_url: "..."
  persist_backend_url: "..."
  license_key: "..."
  external_login_password_mz_system: "enter_mz_system_password"
---
apiVersion: materialize.cloud/v1
kind: Materialize
metadata:
  name: 12345678-1234-1234-1234-123456789012
  namespace: materialize-environment
spec:
  environmentdImageRef: materialize/environmentd:v26.46.0
  backendSecretName: materialize-backend
  authenticatorKind: Oidc
  systemParameterConfigmapName: mz-system-params
Apply the updated manifest to your Kubernetes cluster. With the v1 CRD,
rollouts trigger automatically when spec fields change, so no requestRollout
is needed. See
Upgrading
for details on rollout configuration.
authenticatorKind field is set for any future version upgrades or rollouts of the Materialize CR. Having it undefined will reset authenticationKind to None.
Step 3. Configure OIDC system parameters
Configure the OIDC system parameters to connect Materialize to your identity provider. You can use either a ConfigMap or SQL commands, but it is strongly recommended to use a ConfigMap. See Configure via ConfigMap for more details.
OIDC system parameters
| Parameter | Description | Required | Default |
|---|---|---|---|
oidc_issuer |
The OIDC issuer URL (e.g., https://your-org.okta.com/oauth2/default). Materialize uses this to discover the JWKS endpoint for token validation. |
Yes | None |
oidc_audience |
A JSON array of expected audience values for token validation (e.g., ["your-client-id"]). Use the client ID from Step 1. Materialize checks that the JWT’s aud claim contains at least one of these values. By default, this is empty, and audience validation is skipped. |
No | [] |
oidc_authentication_claim |
The JWT claim to use as the Materialize username. For ID tokens (human users), a common claim is email. For access tokens from the Client Credentials flow, ensure this claim exists in the token. See Mapping IdP users to Materialize roles for details. |
No | sub |
console_oidc_client_id |
The OIDC client ID used by the web console for the authorization code flow. | For console login | Empty |
console_oidc_scopes |
Space-separated OIDC scopes requested by the web console when obtaining a token. Scopes control which claims are included in the token. The openid scope is required to obtain an ID token. Add email to include the email claim, or profile to include name claims. If oidc_authentication_claim references a claim like email, you must request the corresponding scope here. |
For console login | Empty |
oidc_audience is empty, audience validation is skipped. This means
any valid token from the same identity provider can authenticate to
Materialize, including tokens issued for other applications. Always set
oidc_audience in production environments.
Configure via ConfigMap
In Step 2, you already created an empty
mz-system-params ConfigMap. Now, populate that ConfigMap with your
OIDC parameters. At this point, your manifest should look like:
apiVersion: v1
kind: ConfigMap
metadata:
  name: mz-system-params
  namespace: materialize-environment
data:
  system-params.json: |
    {
      "oidc_issuer": "YOUR_OIDC_ISSUER",
      "oidc_audience": "[\"CONSOLE_CLIENT_ID\"]",
      "oidc_authentication_claim": "email",
      "console_oidc_client_id": "CONSOLE_CLIENT_ID",
      "console_oidc_scopes": "openid email"
    }
oidc_authentication_claim to email rather than the default
sub, so each user’s role name comes from their email claim. Because the
authentication claim references email, console_oidc_scopes includes the
email scope to ensure that claim is present in the token.
Apply the updated ConfigMap to your Kubernetes cluster. The changes could take up to a minute to take effect. For more on configuring system parameters via a ConfigMap, see System parameters configuration.
Configure via SQL
Alternatively, connect as mz_system and set the parameters using
ALTER SYSTEM SET. The mz_system user always authenticates with a password,
even when OIDC is enabled.
ALTER SYSTEM SET oidc_issuer = 'https://your-org.okta.com/oauth2/default';
ALTER SYSTEM SET oidc_audience = '["CONSOLE_CLIENT_ID"]';
ALTER SYSTEM SET oidc_authentication_claim = 'email';
ALTER SYSTEM SET console_oidc_client_id = 'CONSOLE_CLIENT_ID';
ALTER SYSTEM SET console_oidc_scopes = 'openid email';
Step 4. Verify the configuration
-
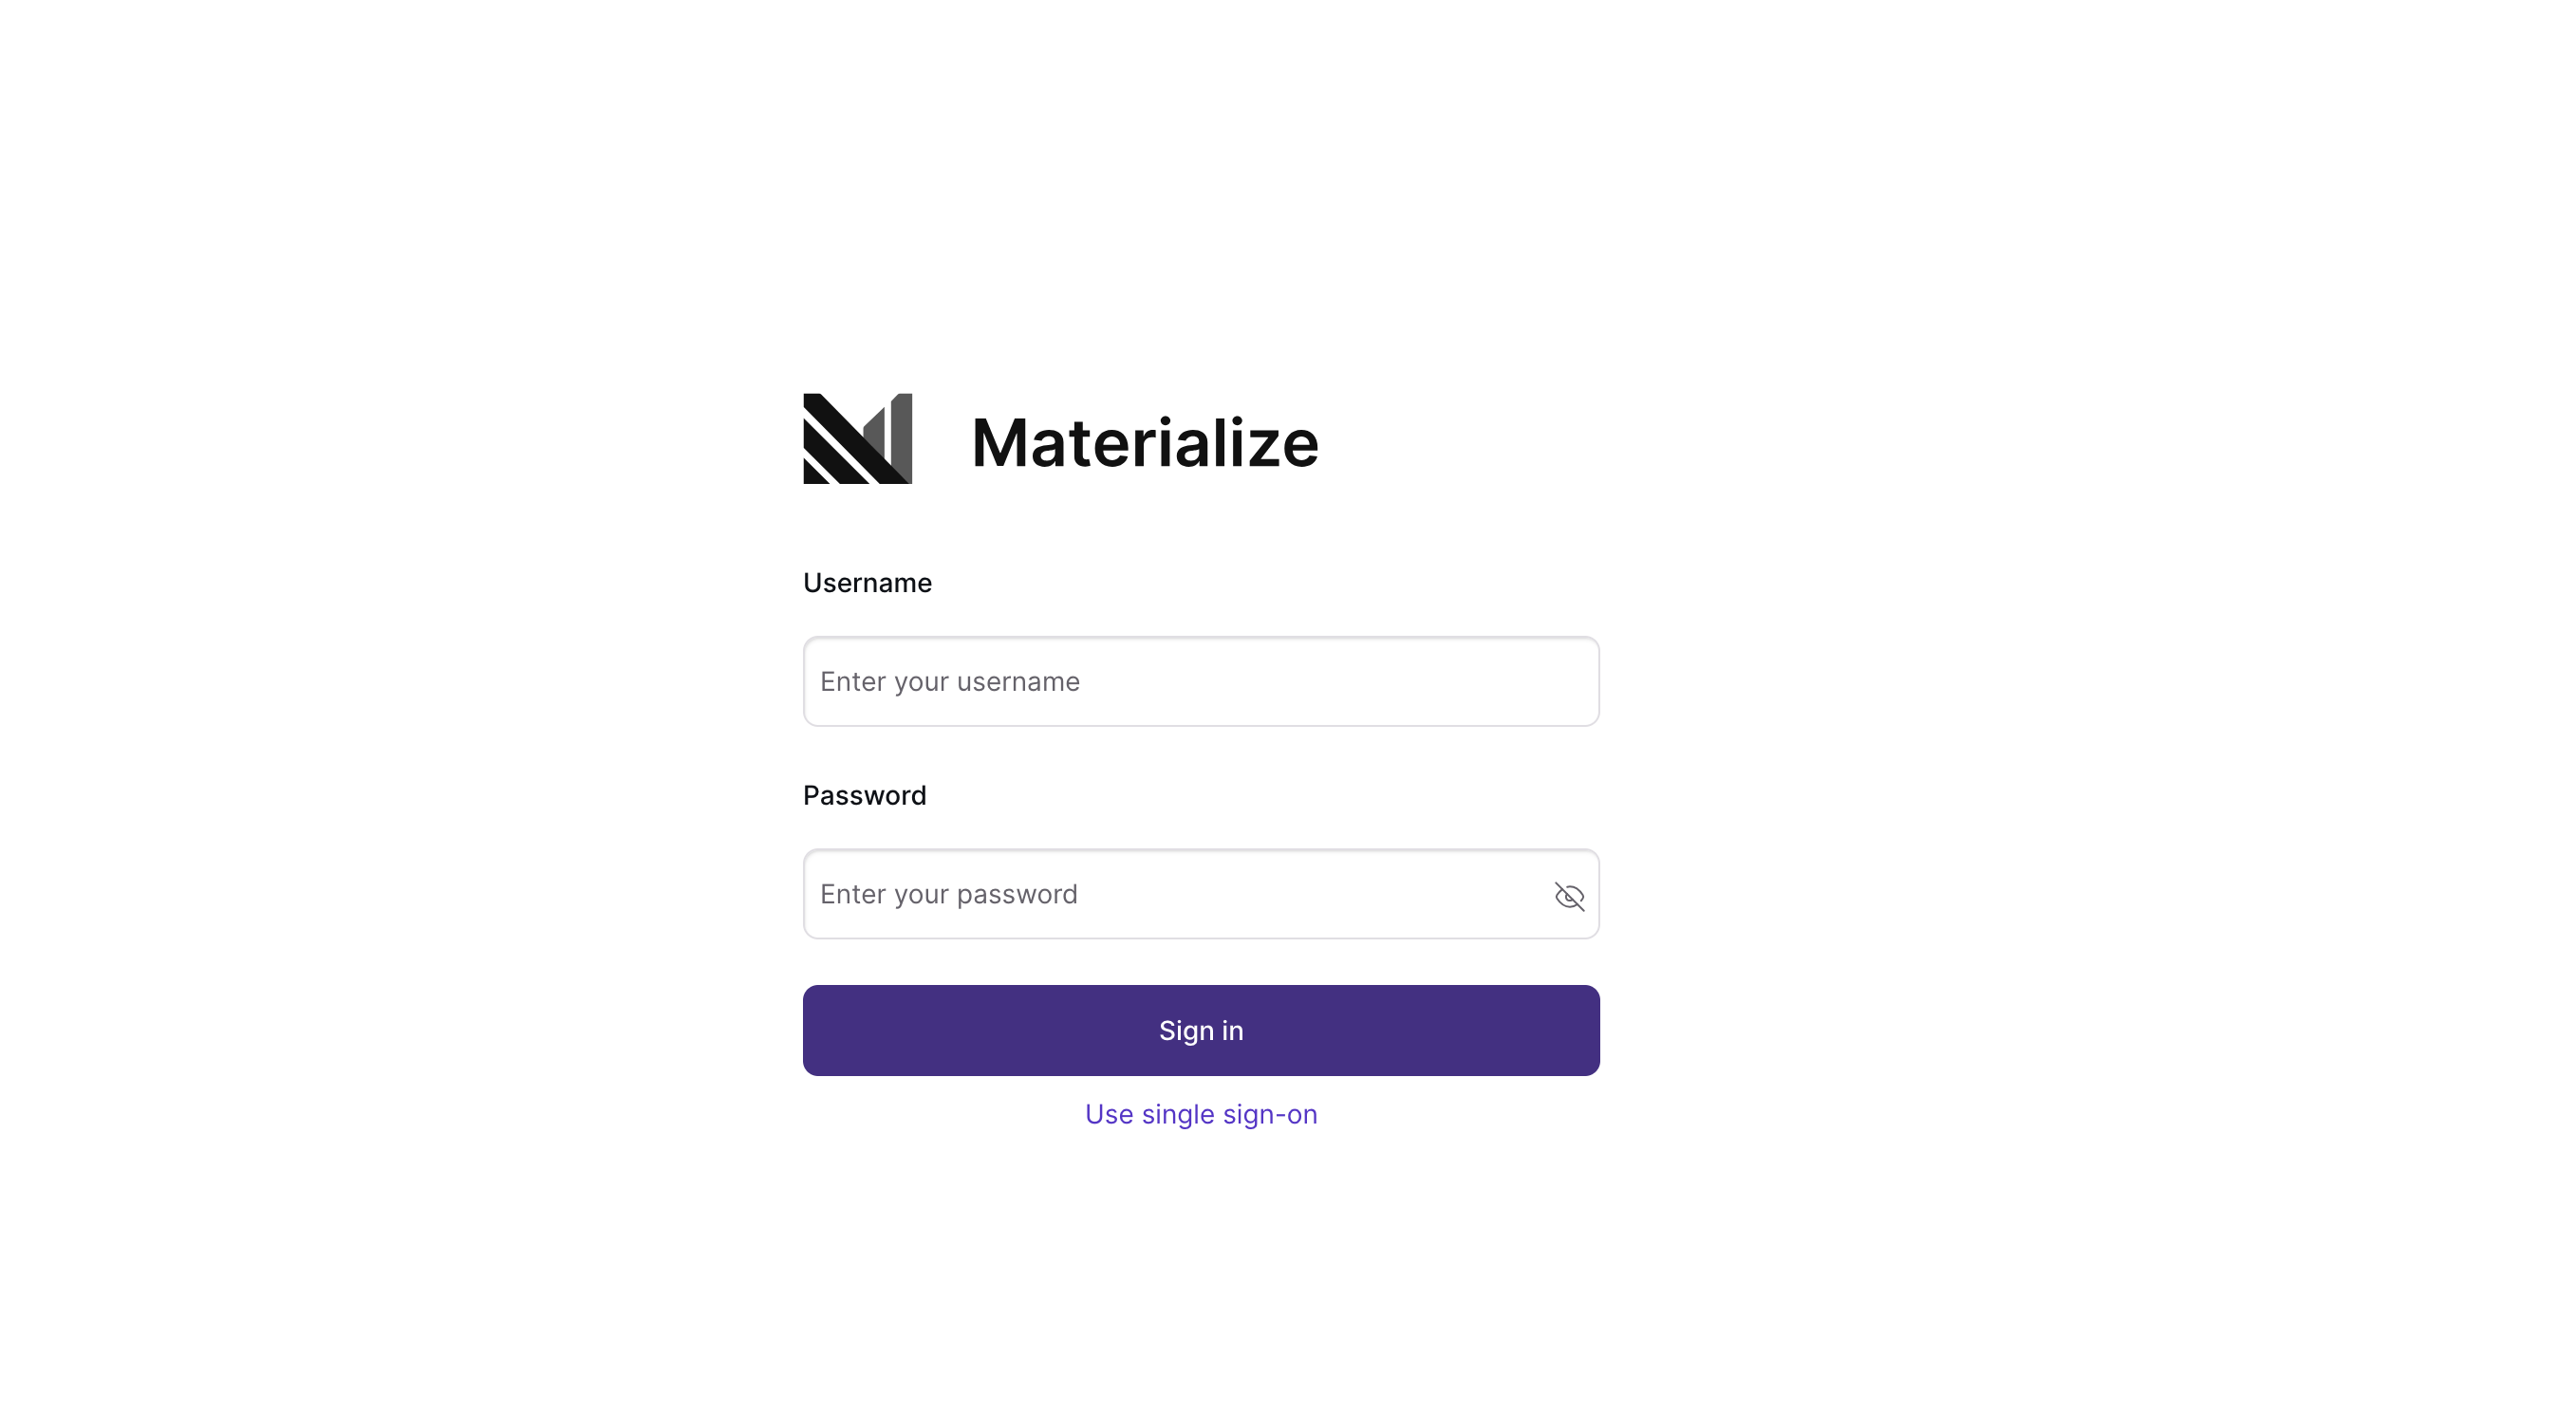
Navigate to your Materialize Console. You should see an option to Use single sign-on.
-
Sign in through your IdP. After successful authentication, you are redirected back to the Materialize Console.
-
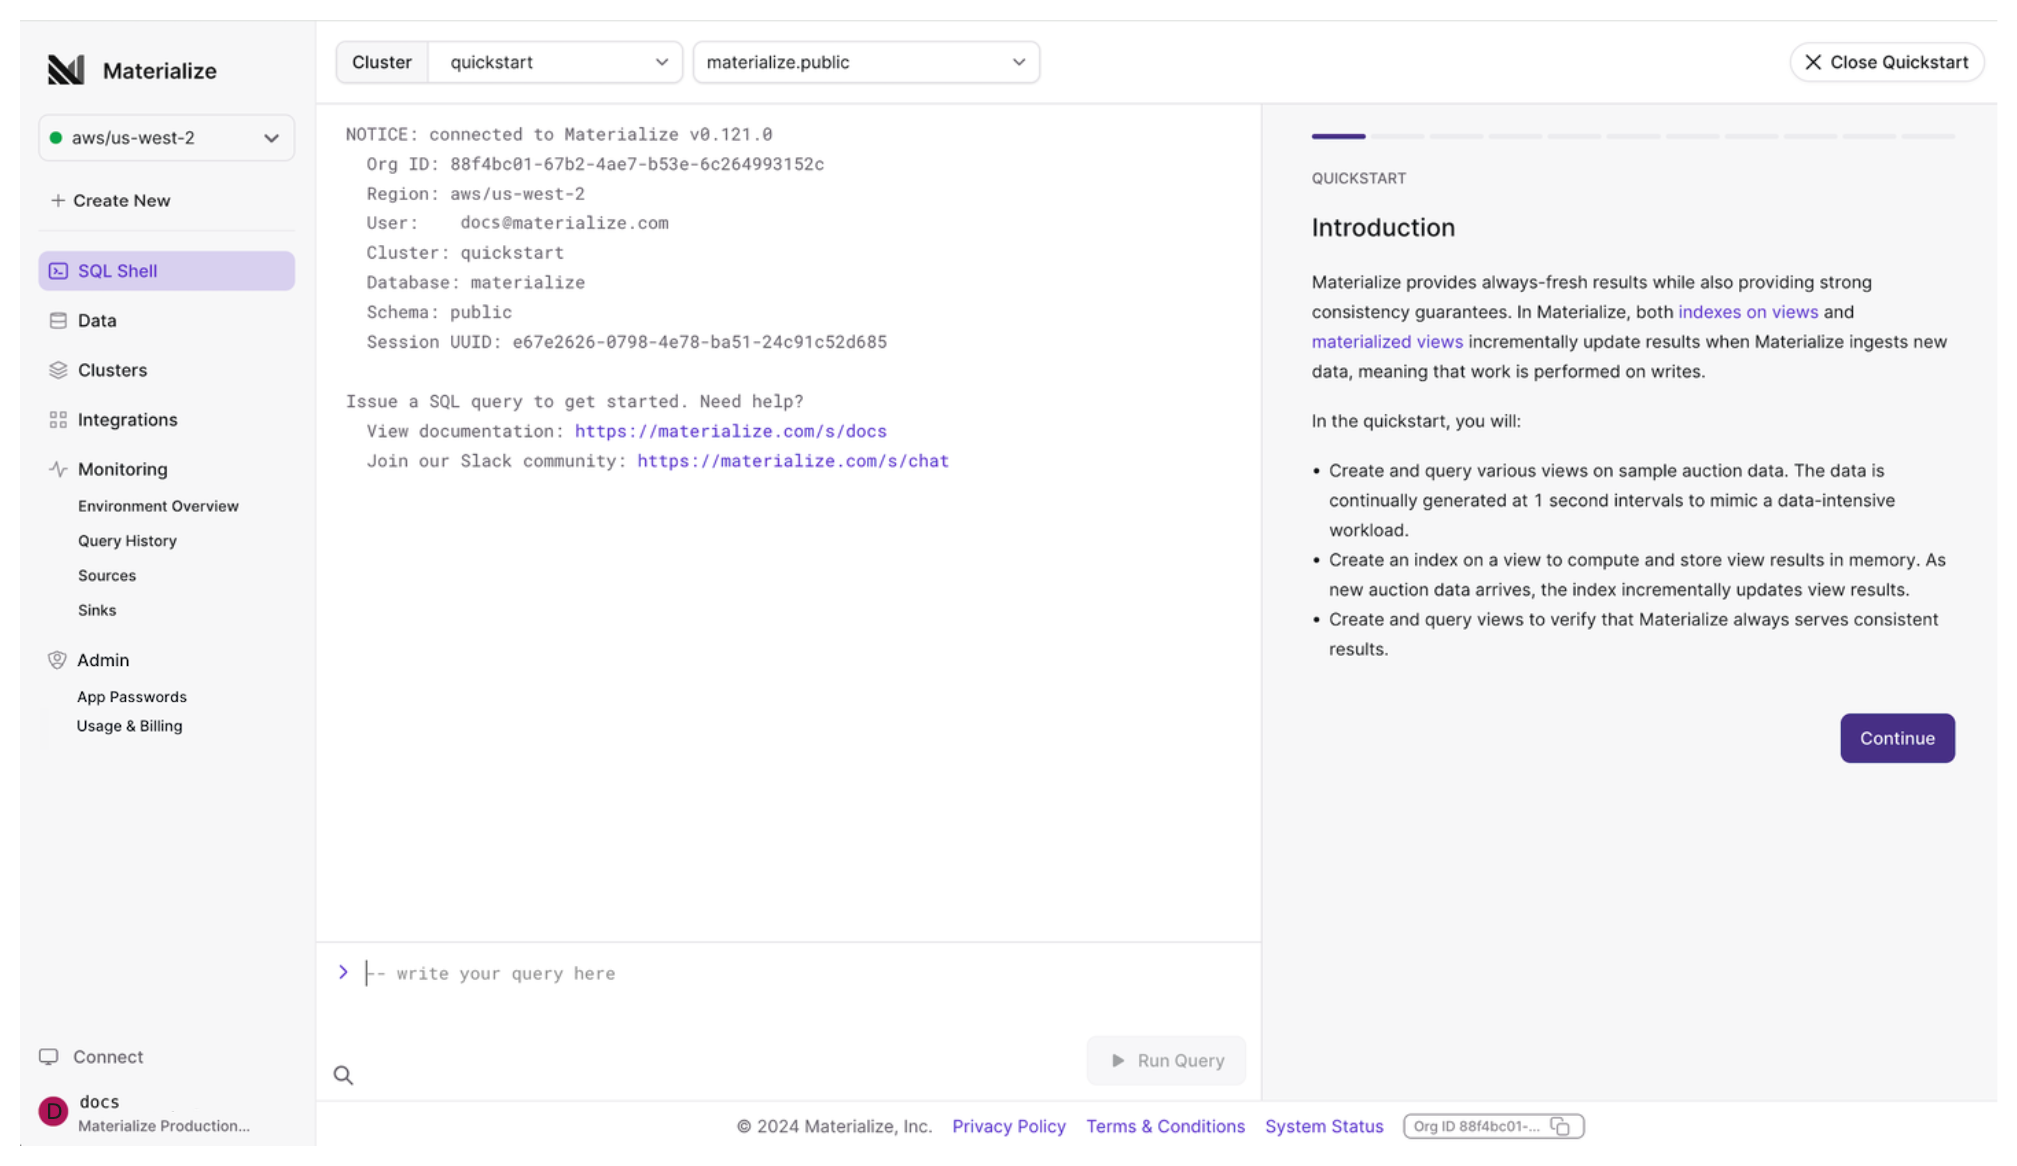
To confirm which role you’ve signed in as via SSO, open the SQL Shell in the Materialize Console. In the welcome message, you should see the role name labeled under “User”. This is derived from the
oidc_authentication_claimclaim in your identity token:
Connecting via SQL clients
To connect to Materialize using a SQL client like psql, you need an OIDC ID token.
If your client doesn’t support OAuth, you can create a role with a SQL password instead. See SQL password authentication.
Get a token using CLI tools
You can fetch an
ID token from the command line using oauth2c.
This is useful when configuring a non-interactive client like dbt or Terraform.
-
Confirm
http://localhost:9876/callbackis registered as a redirect URI on the Materialize Console OIDC client (added in Step 1).oauth2clistens on this URL during the auth code exchange. -
Install
oauth2c. On macOS:brew install cloudentity/tap/oauth2cOther platforms: see the
oauth2cinstallation guide. -
Run
oauth2cto fetch the ID token:oauth2c <ISSUER_URL> \ --client-id <YOUR_CLIENT_ID> \ --response-types code \ --response-mode form_post \ --grant-type authorization_code \ --pkce \ --scopes 'openid email' \ --auth-method none \ --silent | jq -r '.id_token'A browser window opens to complete the IdP login. After signing in,
oauth2cprints the ID token to stdout.
ID tokens expire (typically within an hour). Re-run the command above when your token expires.
Get a token from the Materialize console
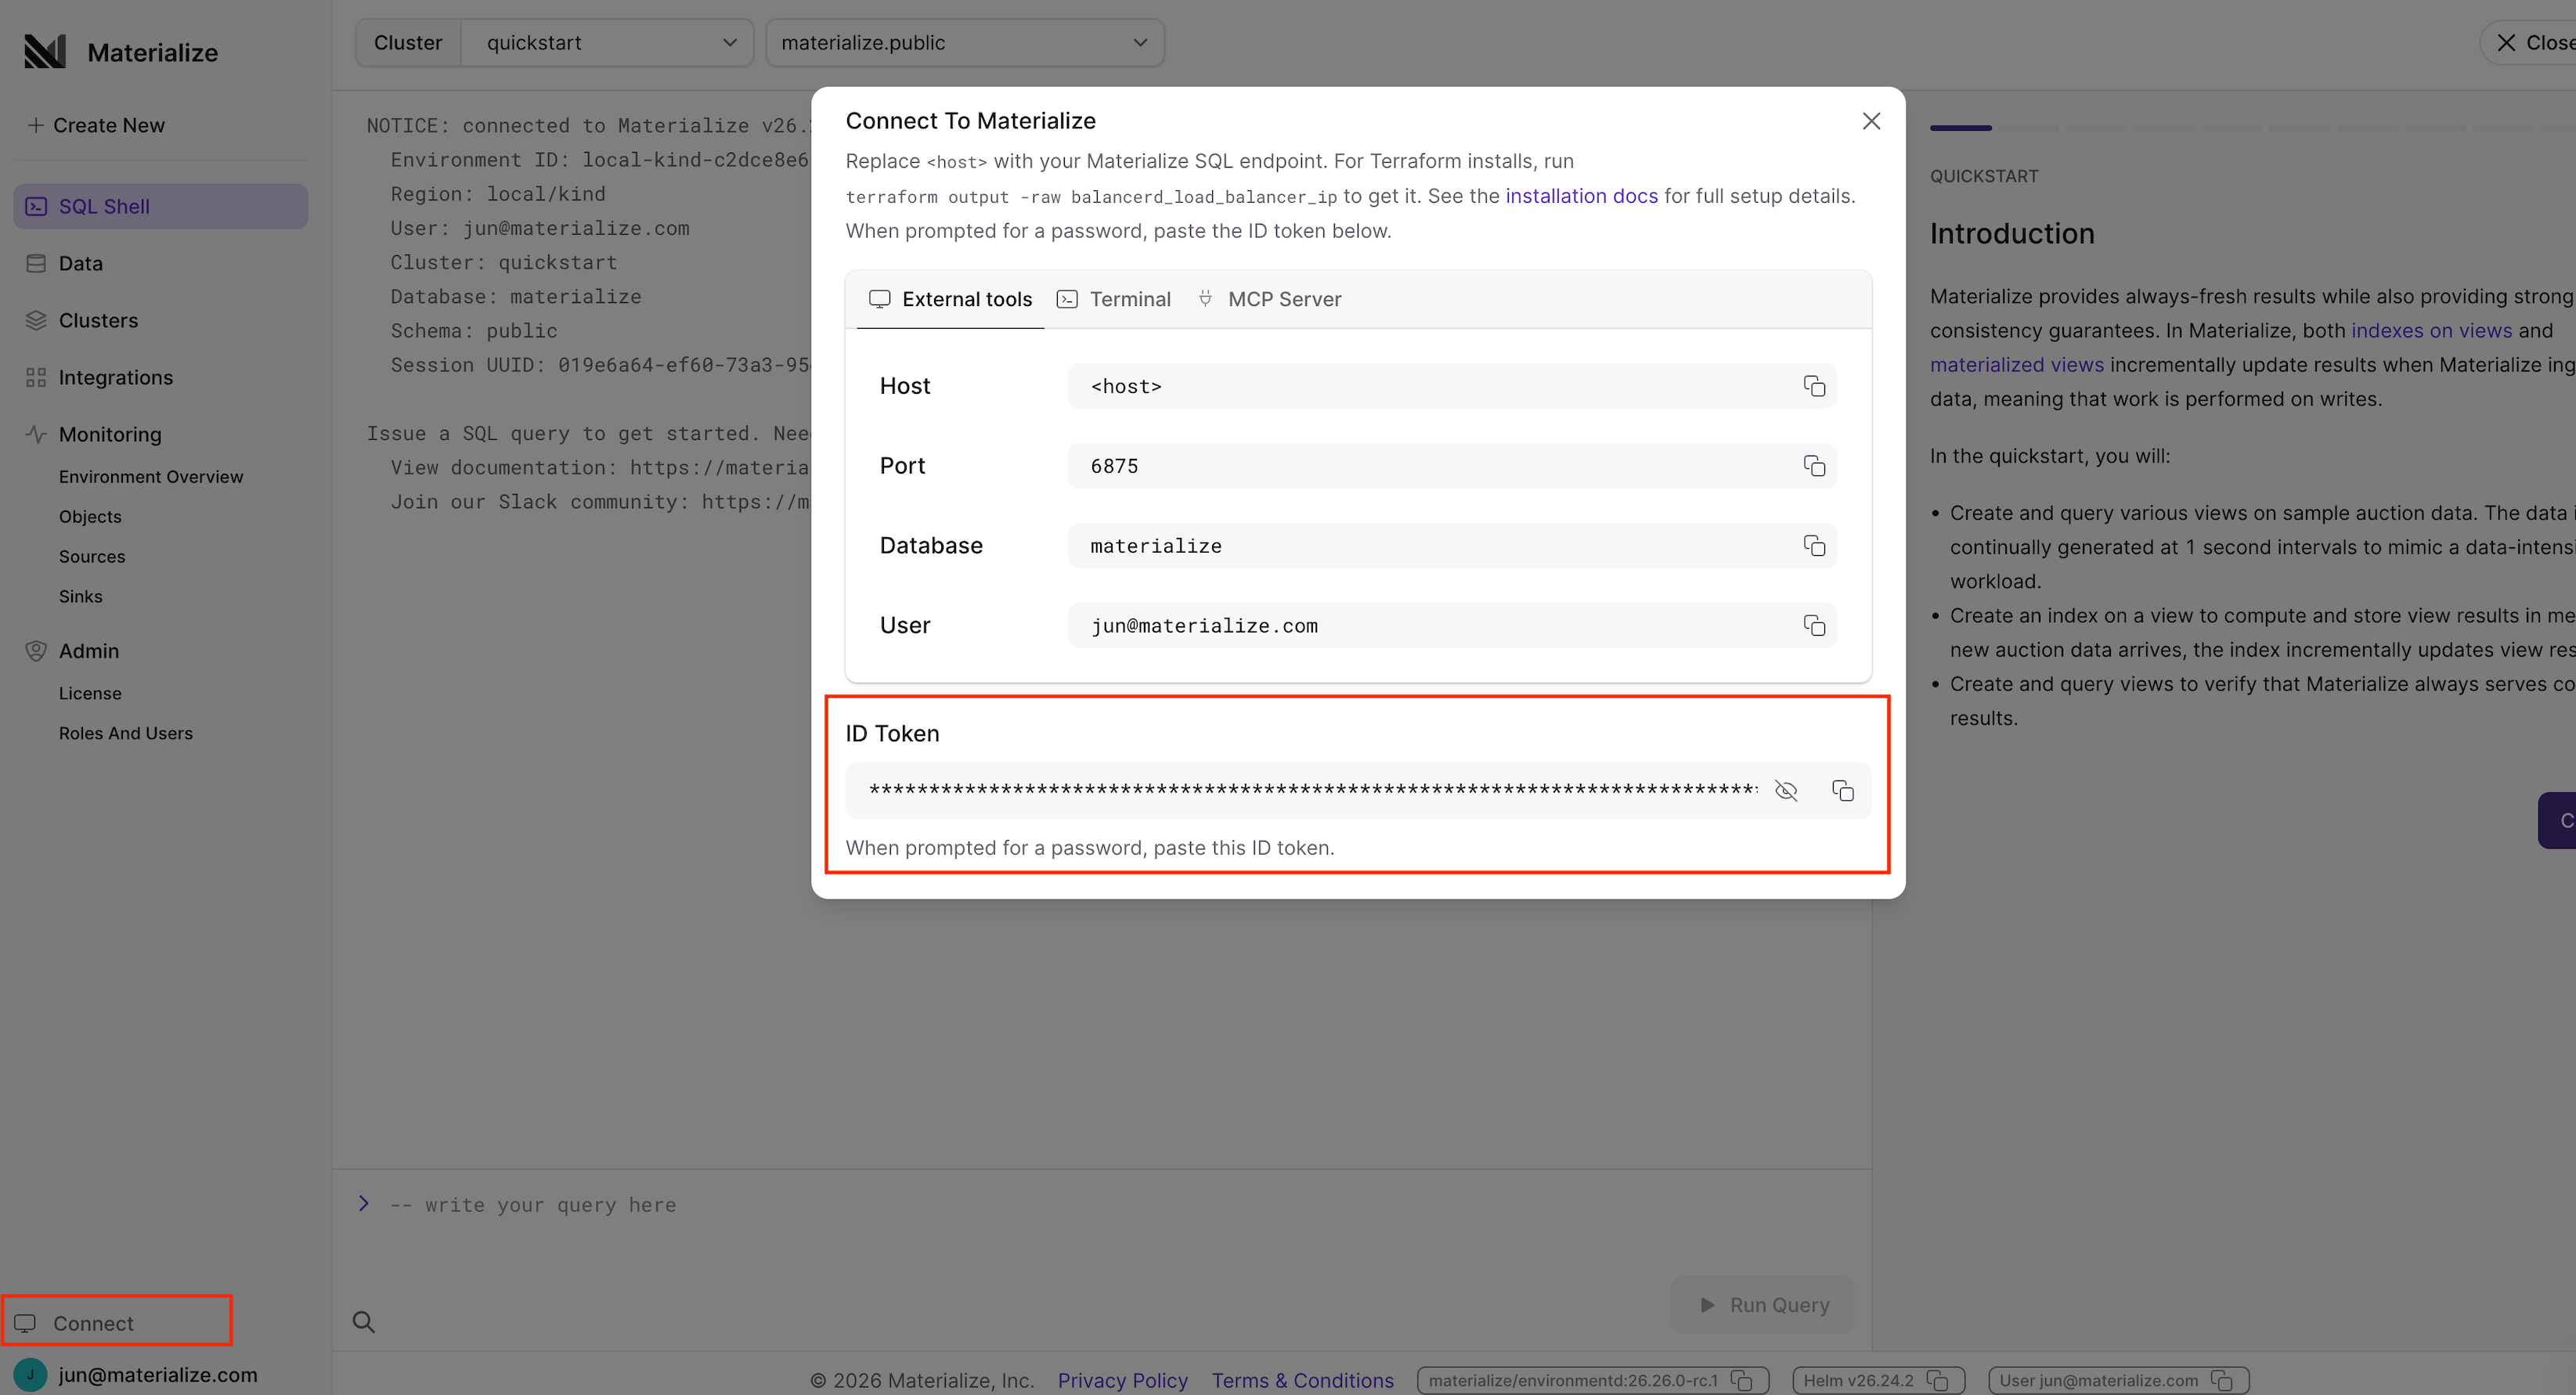
Clicking “Connect” in the Materialize Console will provide you with an ID token that you can use to connect.
Connect with psql
Use the ID token as your password:
PGPASSWORD="<your-id-token>" \
psql -h <materialize-host> -p 6875 -U <username> materialize
Replace <username> with the value of the authentication claim in your JWT
(e.g., your email address if oidc_authentication_claim is set to email).
Connecting MCP clients
OAuth sign-in for MCP clients is available starting in v26.31.
Materialize provides built-in MCP servers at
/api/mcp/agent and /api/mcp/developer. When SSO is enabled, MCP clients
can authenticate with OAuth instead of an MCP
token.
Materialize publishes OAuth 2.0 Protected Resource Metadata (RFC
9728) at
/.well-known/oauth-protected-resource, which MCP-aware clients use to
discover your identity provider automatically.
Unlike the Console, which authenticates with an ID token, MCP clients present an OAuth access token. Access tokens have additional configuration requirements:
Configure your IdP
-
Pre-register an OIDC client for MCP. The MCP specification expects the IdP to support anonymous Dynamic Client Registration (RFC 7591). Most enterprise IdPs, including Okta, do not allow anonymous registration, causing MCP clients to fail during registration (in Okta, with HTTP 403
E0000005). Instead, create or reuse a public OIDC client with PKCE, addhttp://localhost:<port>/callbackas a sign-in redirect URI, and configure the MCP client with the client ID explicitly. -
Include the authentication claim in access tokens. IdPs typically include claims like
emailonly in ID tokens. Ifoidc_authentication_claimis set toemail, configure your authorization server to add anemailclaim to access tokens (in Okta, a claim with valueuser.emailincluded in the access token). Otherwise, Materialize rejects the token because it does not contain the configured authentication claim. -
Use a Materialize-dedicated audience. Configure your IdP so that the access tokens carry an
audvalue specifically for Materialize (e.g., in Okta, create a custom authorization server; in Entra ID, an exposed-API Application ID URI). Note the audience value for the Materialize configuration step below. -
Optional. Define an
mcp.readscope. Materialize advertises themcp.readscope in its resource metadata. Although Materialize does not enforce the scope (authorization happens through RBAC), clients that request advertised scopes fail against IdPs (such as Okta) that reject unknown scopes unless the scope exists on the authorization server. -
Optional. Add the
offline_accessscope for refresh tokens. MCP clients typically requestoffline_accessso they can refresh access tokens without a new browser sign-in. Okta and most enterprise IdPs require this scope to exist on the authorization server. If the client fails to reconnect after the first access token expires, addoffline_accessto the authorization server’s scopes.
Configure Materialize
-
Add the authorization server’s audience value to
oidc_audience. For access tokens, theaudclaim is the authorization server’s configured audience. Use the Materialize-dedicated audience from the IdP step above.Materialize also validates ID tokens (browser sign-in), whose
audis the Console client ID, so both values must be present inoidc_audience. Add the audience values to the existing array, preserving any entries already present. For example:ALTER SYSTEM SET oidc_audience = '["<CONSOLE_CLIENT_ID>", "<MZ_SPECIFIC_AUDIENCE>"]';
Configure your MCP client
-
Connect. For example, to connect Claude Code to the
materialize-agentMCP server with a pre-registered client:claude mcp add --transport http materialize-agent \ https://<host>:6876/api/mcp/agent \ --client-id <YOUR_CLIENT_ID> --callback-port 8080The
--callback-portvalue must match the port in thehttp://localhost:<port>/callbackredirect URI registered on the OIDC client. For more information, see MCP servers.
Host header
must set the http_host_name configuration so that the URLs Materialize
publishes in its resource metadata are correct.
Provisioning roles
Mapping IdP users to Materialize roles
Each user or service account that authenticates via OIDC maps to a single
Materialize database role. When a user authenticates into Materialize, their role name is the value of the JWT claim keyed by oidc_authentication_claim.
For example, if oidc_authentication_claim is set to email and a user authenticates with the following JWT:
{
  "sub": "auth0|abc123",
  "email": "alice@your-org.com",
  "name": "Alice",
  "iat": 1516239022
}
Their role name will be alice@your-org.com.
If a user logs in and no matching role exists, Materialize auto-provisions one, as described in the next section.
Auto-provisioning roles
When a user signs in and no role matching their oidc_authentication_claim
value exists, Materialize automatically creates a role for them.
Auto-provisioned roles:
- Have default privileges only.
- Must be granted additional privileges through RBAC.
- Are not automatically removed when the user is removed from the IdP. See De-provisioning users for cleanup instructions.
Auditing auto-provisioned roles
To view which roles were auto-provisioned via OIDC, query mz_audit_events:
SELECT details
FROM mz_audit_events
WHERE event_type = 'create' AND object_type = 'role' AND details ->> 'auto_provision_source' = 'oidc'
ORDER BY occurred_at DESC;
Roles created through OIDC authentication will have auto_provision_source set to
oidc.
Pre-provisioning roles
An administrator can create roles before users login, rather than rely on auto-provisioning. To pre-provision a role, connect as a superuser and create the role with a name matching the expected JWT claim value:
CREATE ROLE "alice@your-org.com" WITH LOGIN;
Like auto-provisioned roles, pre-provisioned roles start with default privileges only and must be granted additional privileges through RBAC.
Service accounts
For machine-to-machine access, you have three options:
- SQL password authentication: for clients that don’t support OAuth flows.
- Resource Owner Password flow: for service accounts that authenticate against your IdP with a username and password.
- Client Credentials flow: for service accounts that authenticate against your IdP without a user context.
SQL password authentication (recommended for non-OAuth clients)
Even with OIDC enabled, Materialize still accepts SQL password authentication. This is required for clients that don’t support OAuth flows. The simplest way to give such a service or application access is to create a role with a SQL password.
-
As a user with the
CREATEROLEprivilege, create the role with a password:CREATE ROLE "svc-dbt" WITH LOGIN PASSWORD 'a-strong-password'; -
Grant the privileges this service account needs. See Manage database roles for the full privilege model.
-
Connect using the password directly:
PGPASSWORD="a-strong-password" \
psql -h <materialize-host> -p 6875 -U svc-dbt materialize
For dbt-specific setup, see dbt connection profiles. For Terraform, see Terraform: get started.
Resource Owner Password flow
Use this approach when you need a service account that authenticates with a username and password to obtain an ID token.
-
In the Okta Admin Console, go to Applications > Applications and click Create App Integration.
-
Select OIDC - OpenID Connect as the sign-in method and Native Application as the application type. Click Next.
-
Configure the application:
- App integration name: Enter a name (e.g.,
Materialize ROPC). - Grant type: Enable Resource Owner Password.
- App integration name: Enter a name (e.g.,
-
Click Save and note the Client ID and Client Secret.
-
Go to the Assignments tab and assign the service account user.
-
Ensure your authorization server’s access policy includes a rule that allows the Resource Owner Password grant type for this application. See the authorization server setup in Step 1.
-
In Okta, create a new user to serve as the service account (e.g.,
svc-materialize@your-org.com).The Resource Owner Password flow does not support MFA in Okta. The service account user must not have MFA enabled.
-
Fetch an ID token:
curl -X POST https://your-org.okta.com/oauth2/default/v1/token \ -H "Content-Type: application/x-www-form-urlencoded" \ -H "Accept: application/json" \ --data-urlencode "grant_type=password" \ --data-urlencode "username=svc-materialize@your-org.com" \ --data-urlencode "password=YOUR_SERVICE_ACCOUNT_PASSWORD" \ --data-urlencode "scope=openid email" \ --data-urlencode "client_id=YOUR_ROPC_CLIENT_ID" \ --data-urlencode "client_secret=YOUR_ROPC_CLIENT_SECRET" -
Extract the
id_tokenfrom the JSON response and use it to connect:PGPASSWORD="<id-token>" \ psql -h <materialize-host> -p 6875 -U svc-materialize@your-org.com materialize
-
In the Azure portal, go to Microsoft Entra ID > App registrations and click New registration. Create a dedicated registration for this flow rather than reusing the console application from Step 1.
-
Configure the registration:
- Name: Enter a name (e.g.,
Materialize ROPC). - Supported account types: Select the appropriate option for your organization.
- Name: Enter a name (e.g.,
-
Click Register.
-
Go to Authentication and set Allow public client flows to Yes. This is required for the Resource Owner Password flow.
-
On the application’s Overview page, note the Application (client) ID and the Directory (tenant) ID.
-
Go to Certificates & secrets > New client secret. Add a description and expiration, then click Add. Note the secret Value.
-
Create a new user to serve as the service account, then assign it to this application under Enterprise applications > Users and groups.
-
Fetch an ID token:
curl -X POST https://login.microsoftonline.com/<tenant-id>/oauth2/v2.0/token \ -H "Content-Type: application/x-www-form-urlencoded" \ --data-urlencode "grant_type=password" \ --data-urlencode "username=svc-materialize@your-org.com" \ --data-urlencode "password=YOUR_SERVICE_ACCOUNT_PASSWORD" \ --data-urlencode "scope=openid email" \ --data-urlencode "client_id=YOUR_CLIENT_ID" --data-urlencode "scope=openid" \ --data-urlencode "client_id=YOUR_CLIENT_ID" \ --data-urlencode "client_secret=YOUR_CLIENT_SECRET" -
Extract the
id_tokenfrom the JSON response and use it to connect:PGPASSWORD="<id-token>" \ psql -h <materialize-host> -p 6875 -U svc-materialize@your-org.com materialize
-
Create a service account user in your identity provider.
-
Assign the service account to your Materialize application.
-
Enable the Resource Owner Password Credentials grant for your application.
-
Fetch an ID token from your IdP’s token endpoint:
curl -X POST https://your-idp.com/oauth2/token \ -H "Content-Type: application/x-www-form-urlencoded" \ --data-urlencode "grant_type=password" \ --data-urlencode "username=svc-materialize@your-org.com" \ --data-urlencode "password=YOUR_SERVICE_ACCOUNT_PASSWORD" \ --data-urlencode "scope=openid email" \ --data-urlencode "client_id=YOUR_CLIENT_ID" \ --data-urlencode "client_secret=YOUR_CLIENT_SECRET" -
Extract the
id_tokenfrom the JSON response and use it to connect:PGPASSWORD="<id-token>" \ psql -h <materialize-host> -p 6875 -U svc-materialize@your-org.com materialize
Client Credentials flow
Use this approach to treat an IdP client as a service account. This is useful for automated systems that do not have a user context.
oidc_audience is an array of values. Before running the ALTER SYSTEM SET oidc_audience examples below, check the current value with SHOW oidc_audience;
and append the new audience rather than overwriting it. Otherwise you may
remove the Materialize Console’s audience or other configured values.
-
In the Okta Admin Console, go to Applications > Applications and click Create App Integration.
-
Select OIDC - OpenID Connect as the sign-in method and Web Application as the application type. Click Next.
-
Configure the application:
- App integration name: Enter a name (e.g.,
Materialize Service Account 1). - Grant type: Enable Client Credentials (deselect other grant types).
- App integration name: Enter a name (e.g.,
-
Click Save and note the Client ID and Client Secret.
-
Ensure your authorization server’s access policy includes a rule that allows the Client Credentials grant type for this application. See the authorization server setup in Step 1.
-
Configure a custom claim for the service account identity.
The
oidc_authentication_claimsetting is global — it applies to both human users (ID tokens) and service accounts (access tokens). If set toemail, human users get readable role names (e.g.,alice@your-org.com), but Client Credentials access tokens do not include anemailclaim by default. If set tosub, Client Credentials tokens work, but human users lose email-based role names and get opaque subject IDs instead.To solve this, create a custom claim (e.g.,
sql_username) in your authorization server that maps touser.emailfor ID tokens and to a configured value for access tokens:-
In the Okta Admin Console, go to Security > API and select your authorization server.
-
Go to the Claims tab and click Add Claim.
-
Configure the claim for ID tokens (human users):
- Name:
sql_username - Include in token type: ID Token (always).
- Value type: Expression.
- Value:
appuser.email - Include in: Any scope.
- Name:
-
Click Create, then click Add Claim again.
-
Configure the claim for access tokens (service accounts):
- Name:
sql_username - Include in token type: Access Token (always).
- Value type: Expression.
- Value:
app.sub - Include in: Any scope.
- Name:
-
Click Create.
-
Set the authentication claim in Materialize:
ALTER SYSTEM SET oidc_authentication_claim = 'sql_username';
If you have multiple service accounts using Client Credentials, each needs its own Okta application.
-
-
Fetch an access token:
curl -X POST https://your-org.okta.com/oauth2/default/v1/token \ -H "Content-Type: application/x-www-form-urlencoded" \ -H "Accept: application/json" \ --data-urlencode "grant_type=client_credentials" \ --data-urlencode "scope=openid" \ --data-urlencode "client_id=YOUR_SERVICE_CLIENT_ID" \ --data-urlencode "client_secret=YOUR_SERVICE_CLIENT_SECRET" -
Ensure
oidc_audienceincludes the expected audience value for tokens from your authorization server. In Okta, theaudclaim is set to the authorization server’s audience (configured in Security > API > your auth server > Settings), not the client ID:-- Make sure to add to the array if already set ALTER SYSTEM SET oidc_audience = '["<CONSOLE_CLIENT_ID>", "<YOUR_AUDIENCE_VALUE>"]'; -
Extract the
access_tokenfrom the JSON response and use it to connect:PGPASSWORD="<access-token>" \ psql -h <materialize-host> -p 6875 -U <service-account-name> materializeThe
<service-account-name>must match the value of thesql_usernameclaim in the access token (e.g.,svc-my-service).
-
In the Azure portal, go to Microsoft Entra ID > App registrations and click New registration.
-
Configure the registration:
- Name: Enter a name (e.g.,
Materialize Service Account). - Supported account types: Select the appropriate option for your organization.
- Name: Enter a name (e.g.,
-
Click Register.
-
On the application’s Overview page, note the Application (client) ID.
-
Go to Certificates & secrets > New client secret. Add a description and expiration, then click Add. Note the secret Value.
-
Fetch an access token:
curl -X POST https://login.microsoftonline.com/<tenant-id>/oauth2/v2.0/token \ -H "Content-Type: application/x-www-form-urlencoded" \ --data-urlencode "grant_type=client_credentials" \ --data-urlencode "scope=YOUR_SERVICE_CLIENT_ID/.default" \ --data-urlencode "client_id=YOUR_SERVICE_CLIENT_ID" \ --data-urlencode "client_secret=YOUR_SERVICE_CLIENT_SECRET" -
Ensure
oidc_audienceincludes the expected audience value for Client Credentials tokens. In Entra, theaudclaim is determined by thescopeparameter in the token request. When usingYOUR_SERVICE_CLIENT_ID/.default, the audience is the service client ID:-- Make sure to add to the array if already set ALTER SYSTEM SET oidc_audience = '["<CONSOLE_CLIENT_ID>","<YOUR_SERVICE_CLIENT_ID>"]'; -
Extract the
access_tokenfrom the JSON response and use it to connect:PGPASSWORD="<access-token>" \ psql -h <materialize-host> -p 6875 -U <service-account-name> materializeThe
<service-account-name>must match the value of the authentication claim in the access token.
-
In your identity provider, create a new OIDC client application with the Client Credentials grant type.
-
Note the Client ID and Client Secret.
-
Fetch an access token from your IdP’s token endpoint:
curl -X POST https://your-idp.com/oauth2/token \ -H "Content-Type: application/x-www-form-urlencoded" \ --data-urlencode "grant_type=client_credentials" \ --data-urlencode "scope=openid" \ --data-urlencode "client_id=YOUR_SERVICE_CLIENT_ID" \ --data-urlencode "client_secret=YOUR_SERVICE_CLIENT_SECRET" -
Ensure
oidc_audienceincludes the expected audience value for Client Credentials tokens. Check theaudclaim in the token issued by your IdP to determine the correct value:-- Make sure to add to the array if already set ALTER SYSTEM SET oidc_audience = '["<CONSOLE_CLIENT_ID>", "<YOUR_AUDIENCE_VALUE>"]'; -
Extract the
access_tokenfrom the JSON response and use it to connect:PGPASSWORD="<access-token>" \ psql -h <materialize-host> -p 6875 -U <service-account-name> materializeThe
<service-account-name>must match the value of the authentication claim in the access token.
De-provisioning users
When a user is removed from the identity provider, they can no longer authenticate to Materialize because their JWT tokens will no longer be valid. However, the corresponding Materialize role is not automatically deleted. This is intentional to avoid disrupting ownership of database objects.
To remove the role after de-provisioning:
-- Reassign owned objects if needed
REASSIGN OWNED BY <username> TO <new-owner>;
-- Then drop the role
DROP ROLE <username>;
Troubleshooting
| Symptom | Possible cause | Resolution |
|---|---|---|
| Console does not show SSO login option | console_oidc_client_id and console_oidc_scopes are not set |
Set console_oidc_client_id to your OIDC client ID |
| SSO login redirects fail | Incorrect IdP configuration | Verify the redirect URI is set to https://<your-console-domain>/auth/callback and the IdP application type is set as a Single Page Application |
| SSO login redirects to login page | Materialize database is rejecting the token | Verify that the token generated by your IdP includes the required claims. |
| environmentd fails to upgrade | external_login_password_mz_system not set | Ensure the external_login_password_mz_system is configured |
| “Invalid token” error on psql connection | Wrong or expired JWT token | Obtain a fresh token; verify oidc_issuer matches the token’s iss claim |
| “Audience validation failed” | Client ID not in oidc_audience |
Add the client ID to oidc_audience: ALTER SYSTEM SET oidc_audience = '["your-client-id"]' |
| User gets wrong role name | oidc_authentication_claim set to wrong claim |
Verify the claim name and check the JWT contents (e.g., using jwt.io) |
| MCP client fails during registration with the IdP (HTTP 403) | The IdP does not support anonymous Dynamic Client Registration | Pre-register an OIDC client and configure the MCP client with its client ID. See Connecting MCP clients |
MCP client login fails with invalid_scope |
The client requested the advertised mcp.read scope, which does not exist on the authorization server |
Add an mcp.read scope to the authorization server, or configure the client to request only standard scopes |
| MCP client completes login but the connection is rejected | Access token aud is not in oidc_audience, or the authentication claim is missing from access tokens |
See Connecting MCP clients |
To inspect the current OIDC configuration, login as mz_system and run the following SQL:
SHOW oidc_issuer;
SHOW oidc_audience;
SHOW oidc_authentication_claim;
SHOW console_oidc_client_id;
SHOW console_oidc_scopes;
FAQ
What happens during a blue/green deployment?
OIDC configuration (system parameters) and auto-provisioned roles are persisted in the Materialize catalog. Blue/green deployments do not affect SSO configuration or user roles. No additional action is required.
What happens if I tear down my Materialize environment?
Role data and OIDC configuration are stored in the Materialize catalog, which is persisted in your configured object storage (e.g., S3). If you delete the Materialize instance in Kubernetes and re-apply the Materialize CR, the instance rehydrates from the persisted catalog, recovering all roles and configuration.
If the underlying object storage is also deleted, the catalog and all role data are lost. Use your cloud provider’s disaster recovery policies to protect against this scenario.